 Skip to content
Get Educated

Volume Eyelash Extensions | Pinch Method
Volume Eyelash Extensions | Pinch Method
December 12, 2019 by The Lash Professional.

Welcome back, lash boss! Ah, volume eyelash extensions...the lashes of our dreams. If you've never done lash extensions before (but want to), you do classic eyelash extensions, or you do volume lashes, but haven't quite found the perfect method yet, this blog post is for you. By the end of it, you're either going to feel totally empowered to start your lash journey, or you're going to master volume lashes with this technique.
Any lash artist can do this method, and luckily, this technique works for whatever fan style you're going for. You know, you're a lash artist for a reason, so let's get you expressing yourself through fans! This technique is called the pinch method. Why? Because you literally pinch the lashes to make a fan.
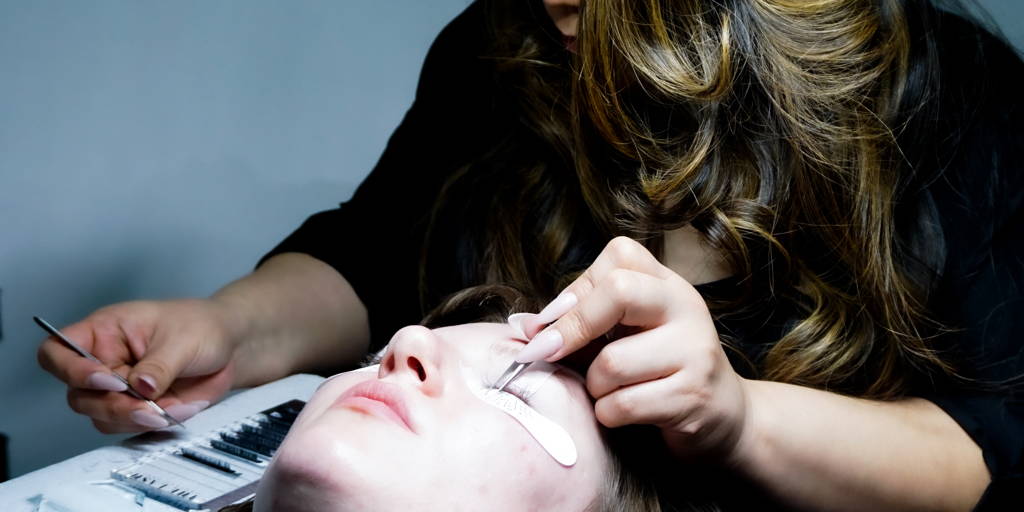
Step 1 | Pull Lashes off the Strip
Put your tweezers on the top and bottom of the lashes, right above the sticky strip that the lashes are attached to. This is the time to decide how big you want your fan to be. Think about the natural lash that you're going to put the fan on, and the look that the client wants to go for. Do you want the fan to be more dense or more narrow? The more lashes you pull, the bigger the fan. The less you pull, the smaller.
Pull the chunk of lashes off of the sticky strip, towards you and up.
Remember, the quality of both the lashes and tweezers you use will affect the fans, and even the way they pull off of the strip!
Step 2 | Pinch the Base of the Lashes
Point the tips of your thumb and index fingers toward your chest, so they're perpendicular to you. We think that this is the easiest way to pinch the base of the fan to get the desired result. As you pinch the base of the group of lashes, slightly release pressure on the tweezers, allowing the lashes to move.
Our lash babe Justine thinks that pressing the tip of the tweezer into your thumb, helps you maintain control of the lashes, even when you release pressure on the tweezers. It also can help twist or direct the lashes in whatever direction you need them to go.
Step 3 | Dip the Fan into the Adhesive
Once you have the base of that fan snatched, dip it into the adhesive very lightly. Remember, there's an adhesive sweet spot. Too much can weigh down the natural lashes and can make them clumpy or even affect your isolation, but too little will have your client coming back complaining about poor retention. Glue that baby onto your client's natural lash, and voila! A gorgeous fan, soon to be joined by all the other fans you'll be pinching into existence.
Do you like watching bomb videos about lashing? Do you wish you could see this particular method in action? Well I have just the thing for you. Check out the video below!
Stay tuned for more blogs, because I want to give you more fan-making methods!
The Lash Professional always wants to set you up for success, so be sure to contact us through our website or on our Instagram!

Volume Eyelash Extensions | Sticky Strip Method
Volume Eyelash Extensions | Sticky Strip Method
January 2, 2020 by The Lash Professional. Posted in Get Educated.
Happy New Year babes! I hope you’ve had a great holiday season, and you got to spend lots of time with your friends and family.
Are you ready to take on 2020? We are. Today we’re talking about yet another method to make fans with volume eyelash extensions. This one actually doesn’t even involve pinching. Can you believe it? Maybe you’ll find this one easier than the tweezer pinch and pinch methods. Maybe you’ll prefer one of the pinch methods over the sticky strip method. Either way, you’ll be able to create some bomb a*s fans, because every artist is different. We love that, and that’s why we’re here to educate you on all the methods you could use!
This step is the same as pretty much every other method out there. You have to start somewhere, right? That starting place is the sticky strip that the lashes come attached to. Don’t forget that it matters how many lashes you pull off of the strip. More lashes make a bigger, more dense fan. Less lashes make a smaller, more narrow fan. The latter is good for clients who have thin, brittle, and weak lashes. At the end of the day, it’s all about that natural lash health!
Next, you’re going to set the chunk of lashes back onto an empty space on the sticky strip. You will use your tweezer to manipulate and move the base of the lashes by shimmying the tweezers back and forth. This will simultaneously spread the tips of the lashes and bring the bases together to be one fan. Continue this motion with the tweezers until your fan is perfect for the natural lash it’s going to live on!
This one’s pretty obvious, and if you’ve read our other fan methods, you’ve read it twice before. Also, I hope that you already know to do this if you’re doing lashes lol! Pull the fan off of the sticky strip with your tweezers, being careful not to pull the lash apart. Dip the base of the fan into the adhesive, no more than two millimeters deep. There’s definitely an adhesive sweet spot, just like with tweezers. Too little and your client will have poor retention. Too much and it could cause clumping and poor retention.
That’s it! Literally, easy as one, two, three. Do you like this method? Do you feel like it’s easier or more difficult than the pinch method or the tweezer pinch method? Maybe you feel like it’s more difficult and you have less control over the lashes. Like I said, either way is fine. We encourage you to find what works for you so you can give your clients those perfect volume eyelash extensions every time.
If you’re more of a visual learner, check out the video below. Our lash professional Vanessa breaks down the method step-by-step for you, so if you had any questions about how something is done, you can see it.
We also have videos about both the pinch method and tweezer pinch method, so head over to our YouTube channel to see those also!

Best Eyelash Glue: What Will Last For Weeks in 2020
Best Eyelash Glue: What Will Last For Weeks in 2020
February 20, 2020 by The Lash Professional.
Babes, we’re jumping straight into this topic because there’s a lot to cover.
First, let’s get something straight; your creative application doesn’t matter if you’re using subpar lashing tools.
Tweezers, lashes, glue—they should all be top quality.
We’re sure you’ve seen the pictures—because we’ve seen them too—of less than happy lash clients with droopy lashes, allergic reactions, and painfully red eyes due to low-quality glue.
Not only is this bad for business, but it’s horrible client care.
That being said, we’re here to educate you on eyelash extension adhesive, and where to find the best eyelash glue for lasting style and comfort.
No lash extensions, or lash bosses, left behind—keep reading!
Best Eyelash Glue: What to Look For & When to Use It
There are a few different things that you should watch out for when purchasing eyelash glue:
- Eyelash extension glue ingredients
- Suggested application use
- Drying and curing time
With that said, we’ve done the hard work for you. The following lash glues are lash professional approved and perfect for your lashing clients.
Black Eyelash AdhesivE
When it comes to types of eyelash adhesives, the most common one you’ll find is black eyelash glue.
Most of the aspiring lash ladies who walk in your door have dark eyelashes. So, the best eyelash glue to use with them is one that blends in with their natural lashes.
Black eyelash glue is an excellent choice for clients with dark lashes who want bold looks that blend in with their natural lashes.
At The Lash Professional, we have several choices for you to check out when looking for the best black eyelash adhesive:
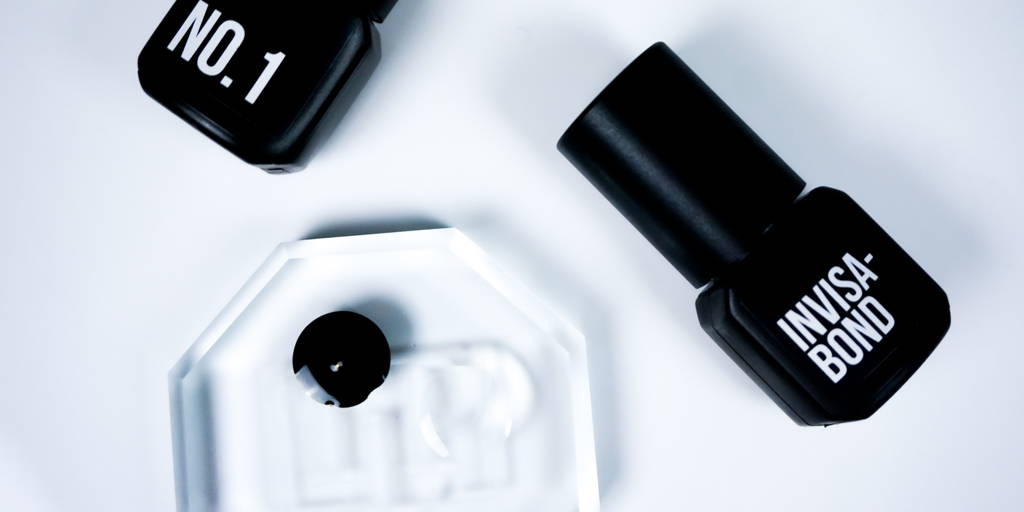
- N1 Eyelash Adhesive (1 second drying time with an 8-week hold, 5ml)
- N3 Eyelash Adhesive (3 second drying time with a 6-week hold, 5ml)
The N1 Eyelash Adhesive dries quickly, which is perfect for giving a client a stunning look in record time. Plus, the N1 Eyelash Adhesive keeps lashes on for 8 weeks for long-lasting lash looks.
The N3 Eyelash Adhesive is a black eyelash glue that has a slightly longer drying time of 3 seconds. This is a good choice for lash artists who are just starting. With slower drying time, you can make easy corrections to lashes if they don’t bond correctly.
Clear Eyelash Adhesive
While clear eyelash glue is less commonly used, it can still be a great ace up your sleeve when making good looking lashes for every client.
So, if black eyelash glue is perfect is clients with dark lashes, then when is clear eyelash glue the best choice?
Clear eyelash glue is your go-to adhesive for clients with light-colored lashes. Additionally, a client with brown eyelashes may need clear glue to help lashes blend.
Here at The Lash Professional, we offer Invisa-bond Clear Eyelash Adhesive, which is perfect for clients with sensitive or lighter colored lashes!
The Invisa-bond Clear Eyelash Adhesive has a quick 1 second drying time and promises up to 8 weeks of lash retention.
Eyelash Adhesive for Sensitive Eyes
We all know that one client who has a hard time finding good lash looks that don’t bother their sensitive eyes or skin. No one should have to take the walk of shame out of the lash studio because of sensitive eyes!
At The Lash Professional, all of our lash adhesives are made with care, but we do offer a special adhesive just for sensitive eyes!
The N5 Sensitive Eyelash Adhesive has a 5 second drying time, which gives amateur technicians time to make any last-minute lash adjustments.
Additionally, the N5 Sensitive Eyelash Adhesive provides up to 4 weeks hold time! This glue is perfect for clients with sensitive eyes giving eyelash extensions a first try.
A final piece of advice? Even for experienced lash technicians, you must check with the client before applying eyelash extensions. We don’t know many techs, if any, who can guess the client’s eye health and sensitivities.
Now, get out there and lash like you mean it!

Eyelash Growth Serum That Works: What to Know - The Lash Professional
Best Eyelash Growth Serum: What Really Works in 2020
March 4, 2020 by The Lash Professional.
Hello, again, lovely ladies!
Today, we are going to show you how eyelash growth serum will prime your lashing game.
First things first: you know you deserve the best, right?
Well, so do those gorgeous lash looks you put together!
That means tools that are anything but the best are a no-go.
Your toolkit should have only the best when it comes to tweezers,eyelash adhesive, and even eyelash growth serum.
These are your moneymakers, ladies—and you have to spend a little to earn a lot!
So, let’s get down to business and talk about eyelash growth serums.
By the end, you’re going to know everything you need in order to find the best eyelash growth serum that works!
Eyelash Growth Serum That Works: What to Ask When Looking
What Does Eyelash Growth Serum Do?
Before you can use the best, you need to know what it’s supposed to do!
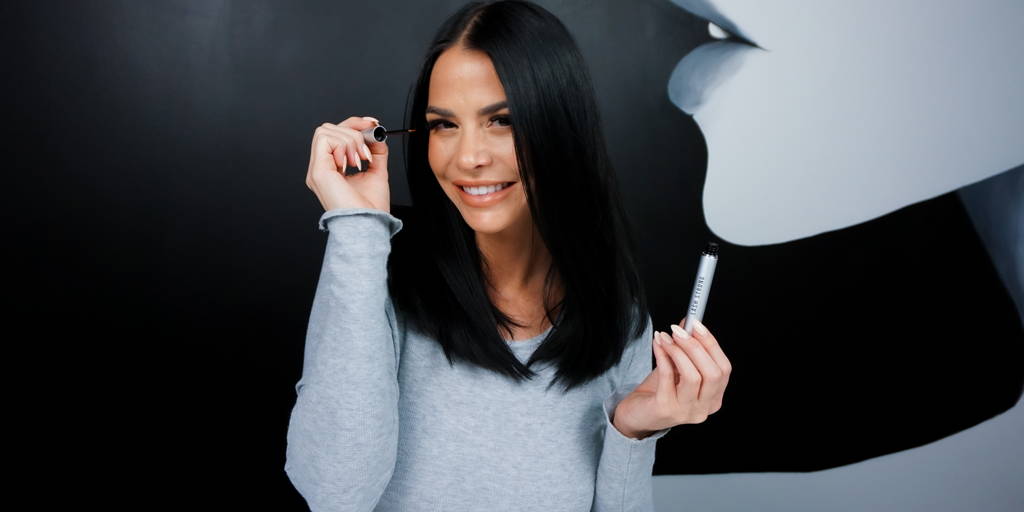
Eyelash growth serum is made to boost the health of your natural lashes, improving the length and strength of your lashes!
Don’t shed any more tears over brittle lashes, ladies.
The end result? When you use eyelash growth serum regularly reap the rewards of stronger and thicker lashes!
While anyone can use it, eyelash growth serum offers the most help to clients with brittle, weak, or short lashes.
If you have a client who’s lashes tend to break, give their lashes a boost with eyelash growth serum. This also works for clients who once had luscious lashes that have grown weaker over time.
As the saying goes, a little goes a long way. With an eyelash growth serum that works, you want a product that doesn’t require constant application. Who has the time for that, anyway?
Good eyelash serum is something you should only have to apply 2-3 times a day.
Then, you can really start to see the fruits of your loving lash labor after about 4 weeks of regular use.
This leaves you and your clients free to live their lash dreams to the fullest!
This is one of the most important things you need to know when looking for eyelash growth serum that works. You want a product that supports your hard lashing work, after all!
There are several ways you can pair this growth serum with eyelash extensions. When a client takes a break from extensions, use eyelash growth serum to nurture their natural lashes.
Not only will this give her natural lashes a boost, but it also allows for better extension application in the future!
With healthier natural lashes, extensions can last longer because there are more natural lashes to attach to.
Fill Your Lashing Toolkit With the Best
Now that you know more about eyelash growth serum, you’re probably wondering why to get some.

How to Prevent Eyelash Extension Allergic Reactions
How to Prevent Eyelash Extension Allergic Reactions
July 15, 2020 by The Lash Professional.

As a professional lash artist, your clients will come to you looking for advice and knowledge on lashes. While it is important to never give clients medical advice of any kind, you should stay educated on these topics.
This means having an answer when a client asks about an allergic reaction to eyelash extension glue or seeks advice on eyelash extension allergic reaction treatment options. When a reaction occurs, it will raise concerns for your client.
Common client questions about eyelash extension irritation include:
- Why is my lash line so itchy?
- How do you help swollen eyelids after eyelash extensions?
- Why do I get an allergic reaction to eyelash extensions?
- Will an allergic reaction to eyelash extensions go away on its own?
In this guide to eyelash extension allergic reactions, we’ll address these topics and more. That way, you can pass your knowledge along to your clients to keep them informed and safe.
Eyelash Extension Allergy vs. Irritation: What’s the Difference?
While an allergic reaction to eyelash extension glue is quite uncommon, it can still occur. Dealing with a client experiencing an eyelash extension allergic reaction can be one of the worst parts of being a lash artist. Having to inform the client that they will need a removal is unpleasant.
It’s important to know the signs of an allergic reaction to eyelash extensions and to be able to differentiate between an eyelash extension allergy and irritation. This will help you make the best judgment call to ensure your client’s safety.
While clients will often associate any sort of reaction as an allergic reaction to eyelash extensions, they are more than likely actually experiencing an irritation. While some of the warning signs between an eyelash extension allergy and an irritation may be similar, there are a few key differences.
*Quick Lash Tip: Always ask new clients to sign a waiver and release form prior to starting the service. This waiver should indicate the risks that are involved with lash extensions.
Symptoms of an Allergic Reaction to Eyelash Extensions
Reactions to lash extensions are rare and can show up in different forms. The most common include:
- Swollen eyes/eyelids
- Redness of the cornea
- Itchiness or discomfort around the eye area
These symptoms are likely to show up within the first 48 hours post-application. While an eyelash extension reaction that results in irritation will subside, an allergic reaction worsens overtime.
Reactions are likely to become increasingly worse and more dramatic the more the client is exposed to the allergen.
Symptoms of an Irritation to Eyelash Extensions
While irritations can have similar signs to allergies, they are often less severe and subside after the adhesive is cured. This occurs typically within the first 24 hours post-application. Often even just hours after.
Irritations can cause:
- Redness
- Itching
- Watery eyes
It is often the body’s reaction to the fumes being released from the adhesive as it cures. These irritations are likely to subside quickly and become milder as time goes on.
Irritations may also occur when a client is experiencing seasonal allergies or if their eyes tend to be more sensitive in general.
Eyelash extension allergic reactions: What to know
Are you experiencing an allergic reaction to eyelash extensions? While lash extensions can enhance your natural beauty, it's crucial to address any discomfort or reactions you may be encountering. An allergy to eyelash extensions can manifest in various ways, from itching and redness to swelling or irritation. We understand the importance of both aesthetics and safety when it comes to beauty enhancements.
Hypoallergenic lash extensions offer relief to individuals allergic to lash extensions. Our hypoallergenic extensions use gentle adhesives and materials designed for sensitive eyes to minimize risk. If you've previously experienced allergic reactions while getting extensions done or simply wish to prevent future ones altogether, our specially tailored products offer comfort and peace of mind.
“Conjunctivitis may also be caused by allergens such as pollen, perfumes, cosmetics, smoke, dust mites, Balsam of Peru, or eye drops.The most frequent cause of conjunctivitis is allergic conjunctivitis and it affects 15% to 40% of the population.”
Your eyes deserve only the finest care, which is why our selection of allergy to eyelash extensions test offers you an exquisitely luxurious experience. Discover longer, fuller lashes without risk of allergic reactions; invest in yourself today by selecting our allergy-friendly extensions; don't let sensitivities hold back from experiencing captivating eyelashes' allure; buy now and relish its glamour without incurring additional allergies worries!
Can You Be Allergic to Eyelash Glue?
Treating an Eyelash Extension Allergic Reaction
As with any other chemical or substance, a client can develop an allergic reaction to eyelash extension glue at any point in time. Even if they have been exposed to it before, with no prior reactions, as with other allergies, symptoms can become stronger and more severe over time, especially if the individual is continually exposed to the allergen after the initial reaction.
Therefore, if the initial reaction has not completely subsided in 24-48 hours post application, do not leave the lash extensions on or continue to re-expose the client to the allergen. Doing fills every couple of weeks will likely only worsen the problem over time.
If you've ever wondered how to help swollen eyelids after eyelash extensions, we've got you covered. It's essential to distinguish between an eyelash extension allergy vs irritation. Dealing with redness and puffiness? It could be an allergic reaction to lash extensions. Quality matters, so ensure your lash technician uses hypoallergenic adhesives and lashes. If irritation persists, consider a patch test to rule out allergies.
For general relief, try a cold compress to soothe swollen eyelids. If it's an eyelash extension allergy, consult a professional immediately. Choose quality over shortcuts to avoid the aftermath of an allergic reaction to lash extensions. Your eyes deserve the best care, ensuring a stunning look without compromising comfort and safety. Invest wisely in your lash extensions to enjoy the beauty without the puffiness.
Read More: How to Care for Red Eyes After Eyelash Extensions
Eyelash extention allergic reaction - How To Treat Red Eyes After Eyelash Extensions?
Ease discomfort with these effective remedies. Firstly, apply a cold compress to reduce swelling and soothe irritation. Using over-the-counter artificial tears can help lubricate and calm the eyes. Ensure proper hygiene by avoiding rubbing or touching the eyes excessively. If symptoms persist, consult an eye specialist. Embrace your beauty worry-free by choosing hypoallergenic lash extensions to prevent red eyes after eyelash extensions. Take control of your eye health and enjoy stunning lashes with peace of mind. Treat your eyes to the care they deserve. You can get awarness as well as treatment Eyelash Extension Glue.
Eyelash Extension Allergic Reaction Treatment
Learn How to Create Lash Looks for Sensitive Eyes -
It is important to stay educated and knowledgeable. Be able to recognize the warning signs of eyelash extension allergic reactions. In turn, this keeps your clients safe.
However, you should never give your clients any medical advice. If they are experiencing a severe reaction or have any health concerns that may make them more susceptible to reactions, it is recommended that they consult with a healthcare professional. As much as we want to help our clients deal with these issues, sometimes it is out of our control.
Want to learn more about handling sensitive skin during the eyelash extension application process? The Lash Professional offers extensive training classes that can teach you how to apply eyelash extensions and extra precautions you can take to protect your client’s eyes. We’ll cover how to quickly respond to reactions and avoid them altogether more in-depth during these courses.
XOXO, JULIE @ THE LASH PROFESSIONAL

Eyelash Extension Room: 5 Tips to Set Yours Up - The Lash Professional
Eyelash Extension Room: 5 Tips to Set Yours Up
August 5, 2020 by The Lash Professional.
You’ve mastered the lash skills. You have the supplies in your eyelash extension kit and are ready to start lashing. But is your space as welcoming and prepared for clients as you are?
You only have one chance to make a great first impression. Your eyelash extension room is a big part of this. That’s why it’s imperative to create a space that clients look forward to visiting and frequently relaxing to get lash services.
Whether you want girly plush vibes or a boho dream interior, we’ve got lash room ideas that will elevate your space’s energy.
Lash sisters, take notes. Here are five tips on creating an oasis that clients can’t wait to visit again.
How To Set Up A Lash Room
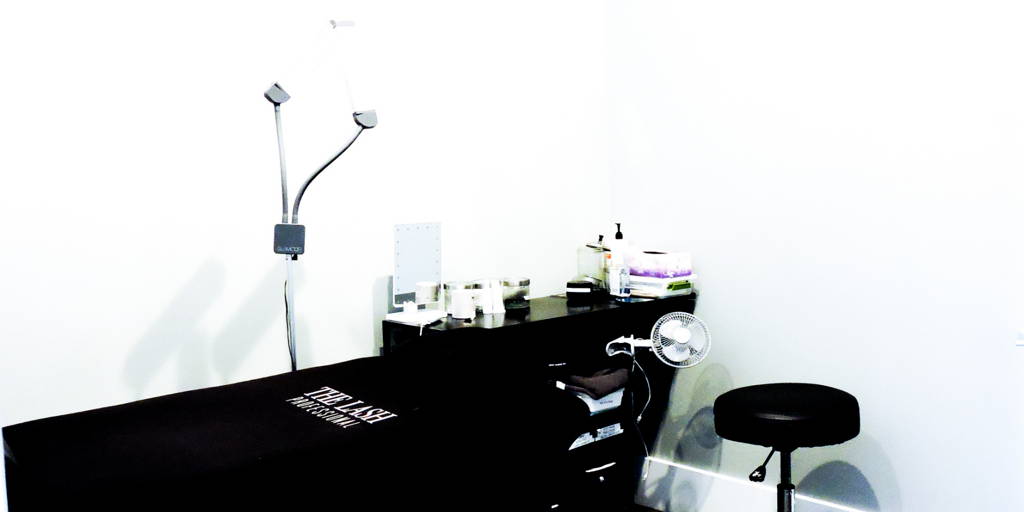
1. Discover the Ideal Lash Room Layout
First things first, decide where each piece of furniture in your lash room will go. Larger items like your lash bed or lash chair usually take center stage in an eyelash extension room. Then, necessary tools like an overhead light, and the lash artist’s chair will naturally find their place near this centerpiece.
Of course, no two eyelash extension rooms are identical. If a layout with the lash bed hugging a sidewall works better, go for it! Experiment with furniture placement to discover the layout that works best in your space.
Remember, the goal is comfort for your clients. Your layout should support this. Many clients like to use their appointment time for a refreshing nap while you work on their lashes. Here are a few additions that encourage Sleeping Beauty tendencies:
- Get extra padding for your lash bed. You can find it at just about any superstore—Target, Walmart, you get the picture. This will not only make clients comfier but will make them less antsy, too.
- Invest in a nice cozy blanket! On top of your lash bed fitted sheet, add a fluffy blanket will make any client sink into the lash bed a little deeper. You can also incorporate a great lash pillow into your set up.
- Have a fan on standby for clients who get warm during the appointment. The cool breeze and low hum of the fan can lull clients to sleep.
- Set the mood with a calming playlist. Relaxing music sets clients at ease and brings soothing energy to the room.
For the next set of lash room ideas, awaken your creative side!
Fashion icon Coco Chanel once declared, “A girl should be two things: classy and fabulous.” We believe the same goes for a girl’s lash studio.
It’s important to keep your studio looking clean and polished. Going overboard on decor and furniture pieces can lead to a cluttered or busy feeling that’s the opposite of relaxing. Instead, focus on weaving your style into the details of the salon for a cohesive look. You can do this through:
- Photos and fixtures. Incorporate your brand vibe throughout your space in the form of your color scheme and logo. Here at The Lash Professional, we love sprinkling our signature lash logo all around the space, including on bookshelves and as wall decor.
- Salon signage. Make sure the signs inside and outside of your lash salon match your brand aesthetic. For instance, keep the font and colors consistent and make sure the material of the signs fits the vibe.
- Color, Color, Color. Setting up a lash room is more than creating a look. It’s about the energy and the mood you are setting. How do you want your clients and artists to feel when they are in your lash salon?
Color can help you convey this. For instance, blue sparks feelings of familiarity and trust. Color expert Kate Smith regards blue as, “a constant in our lives, between blue sky and blue water. There’s a real trust factor with blue.”
Lash Pro Tip: Designing a lash room without a strong idea of your brand is not a good idea. Learn how to brand yourself as an eyelash extension provider for a firm foundation.
The overhead lighting will assist your client’s in seeing their lovely lashes after every appointment. You want to do EVERYTHING humanly possible to make those lashes look kick-ass.
Actually, you want to do everything possible to make your client take a kick-ass picture for Instagram and tag you! Lighting is the most important factor in that.
How many times have you taken a “great” photo with terrible lighting? Let’s face it. Poorly lit photos don’t usually make it much further than the camera roll. Remember babes—lighting can make or break the set up.
In addition to overhead lighting, you’ll need a top tier lash light. This is a piece that you do not want to skimp on. Investing in an amazing lash light will forever change your lash photo game. We are in a long term committed relationship with the Glamcor Lash Light. You can learn all about what to look for in lash extension lighting here.
Whatever lash room ideas you have in mind, make sure to focus on a clean space that welcomes clients. Your salon should be an escape from reality for each person that walks through the doors.
Do you have limited space for your lash room set up? In the words of the always polished Tim Gunn, make it work. Here are some lash room ideas for small spaces that will wow your clients.
Minimal space? No problem. Spruce up your eyelash extension room with the addition of some tasteful wall decor.
You can decorate vertically, to draw the eye upwards. Consider attaching some shelves to the walls to hold decorative pieces. Strategically placed mirrors help space appear larger as well.
Remember, a space doesn’t need to be full of furniture to feel complete. Little details combine to bring a lash room to life.
Babes, let’s face it, your clients probably don’t want to stare at your eyelash mannequin while in your eyelash extension room. Having enough storage for all your back stock, supplies, and tools is huge. If you have all these things out and stacked and visible, it will look like a cluttered mess!
We all know how easy it is to collect lots of lash trays, tweezers, tape, and eye pads. We get excited over having so many options! However, clients don’t get excited about seeing it all.
But there’s good news! Storage can be chic. Sleek bins and easy-rolling carts make storing your lash supplies a (visually appealing) breeze.
If you organize your products neatly, you can utilize clear storage bins that add a sleek look to the room. Otherwise, opt for a color that fits in with the overall salon. You can’t go wrong with black and white since these timeless shades go with any decor. Do yourself and your clients a favor by getting enough storage to tuck your lash supplies away.
Here’s to a Studio That’s as Fabulous as You Are!
We hope these lash room ideas sparked the creative chord in you. Clients will come to you, not only because you do quality work, but also because they enjoy spending time with you in your lash salon. Remember to focus on making their experience a relaxing, fun and positive one.

How Many Eyelash Extensions Should Fall Out Per Day?
How Many Eyelash Extensions Should Fall Out Per Day?
August 12, 2020 by The Lash Professional.
A fresh set of beautifully placed eyelash extensions brings a smile to any lash-loving babe. But when eyelash extensions fall out, the look is less than amazing. As lash artists, it’s important to have information ready in case clients ask questions, such as:
- How many natural eyelashes do you lose in a day?
- Why do my eyelash extensions keep falling out?
- How many eyelash extensions do you lose in a day?
- Why are my eyelash extensions falling out after a week?
We have answers to these questions and more. Think of us as your eyelash extension fairy godmother. Learn how to wave your lash wand and treat eyelash extensions that fall out immediately.
How Many Eyelashes Do You Lose in a Day?
To answer the question “how many eyelashes do you lose in a day?”, you have to understand the natural eyelash growth cycle.
First things first, it’s important to understand that lash loss is a normal part of the growth cycle. Just like the hair on our heads, lashes grow (and shed) in a cycle. Wondering how often your eyelashes fall out in this cycle? Well, natural lashes shed every day, and the loss of 2-5 natural lashes a day is normal.
We’ve covered the shedding behavior of natural lashes. But how many eyelash extensions fall out per day? The answer is pretty simple.
Eyelash extensions are placed in a way that allows the natural cycle to continue as usual. This means that the natural lashes will shed with their extension as they are attached. So lash extension shedding mirrors natural lash shedding. In other words, If you normally lose 2-5 lashes per day, you’ll likely lose about the same amount of lash extensions per day. The entire growth can take a few weeks, which is why eyelash extensions can typically last roughly 2-4 weeks.
While you can’t change anything about the natural lash cycle, you can inform your clients, so they expect a bit of shedding.
Why Do My Eyelash Extensions Keep Falling Out?
Now that you know how many eyelashes you lose in a day, it’s important to understand why eyelash extensions fall out in the first place. Lash extensions can fall out for several reasons. We’ll break this down into two main categories — what happens at the lash salon and what happens post-appointment.
One cause of premature lash shedding is improper lash application technique. Isolating the individual lash before applying each extension is super important! It allows for the natural shedding process to occur.
If some stubborn lashes are getting in the way, use lash tape to make the process run smoother. There’s a reason lash tape is on every lash professional’s list of must-have eyelash extension tools.
Another reason eyelash extensions fall out has to do with the amount of lash adhesive being used. This is kind of a Goldilocks situation — you have to use just the right amount of eyelash glue for gorgeous lashes. Too much lash adhesive weighs down the lashes and causes them to fall out. Too little glue means there is not enough to anchor down the lashes.
If clients reach out about eyelash extensions falling out after a week, examine your lashing technique to see if you’re following the five methods that make lash extensions last.
The length of time that eyelash extensions lastdepends on multiple factors, including how well clients take care of their lashes. Make sure to give detailed aftercare instructions, so no one has to deal with eyelash extensions falling out prematurely. Here are five practical pieces of advice you can give to your clients to promote healthy, long-lasting lashes.
Oil-based products are the enemy of lash adhesive. Ensure that oil stays away from the eye area so that it does not weaken the adhesive and cause lashes to come loose. Also, encourage clients to keep their hands away from their faces. Natural oils from the skin can transfer onto lashes, causing poor retention.
Friction is another reason eyelash extensions fall out earlier than expected. To avoid rubbing the extensions and potentially crushing them, sleeping on your back is best. Make sure you also remove all makeup before you crawl into bed! Leaving mascara on overnight can weaken your lashes and lead to lost extensions. Not to mention, sleeping in any makeup is a big no for your skin!
However, rubbing makeup off can also pull eyelash extensions out prematurely. If you choose to wear eye makeup, such as oil-free mascara, make sure that you are gently cleansing your lashes at the end of the day to avoid damage.
Your eyelash extensions should easily replace that eyelash curler resting in your makeup bag — and for a good reason! Using an eyelash curler can pull on both your natural lashes and your extensions, causing them to fall out too early. Put the curler down and let your stunning new eyelash extensions do the work.
A quality lash serum can help to promote the natural growth of your lashes and extend the life of your extensions. Serums are a great option for those with naturally brittle lashes or those who experience premature lash loss regularly.
Also, following the eyelash extension aftercare instructions provided is essential to ensure proper retention. Make sure your clients have this knowledge before they leave the salon to reduce premature lash extension loss.
Step Up Your Lash Care Game for Show-Stopping Lashes
There are more awesome lash tips where that came from! For advice from the pros on all things eyelash extensions, visit The Lash Professional blog.
With the right education, you’ll be ready for any questions or concerns that clients bring to you. C’mon, who doesn’t want to come across with confidence and knowledge? If you’re interested in becoming a boss lash babe, consider getting certified via our lash extension training courses. Happy lashing!

Eyelash Extension Kit Essentials - The Lash Professional
Eyelash Extension Kit Essentials
August 20, 2020 by The Lash Professional.
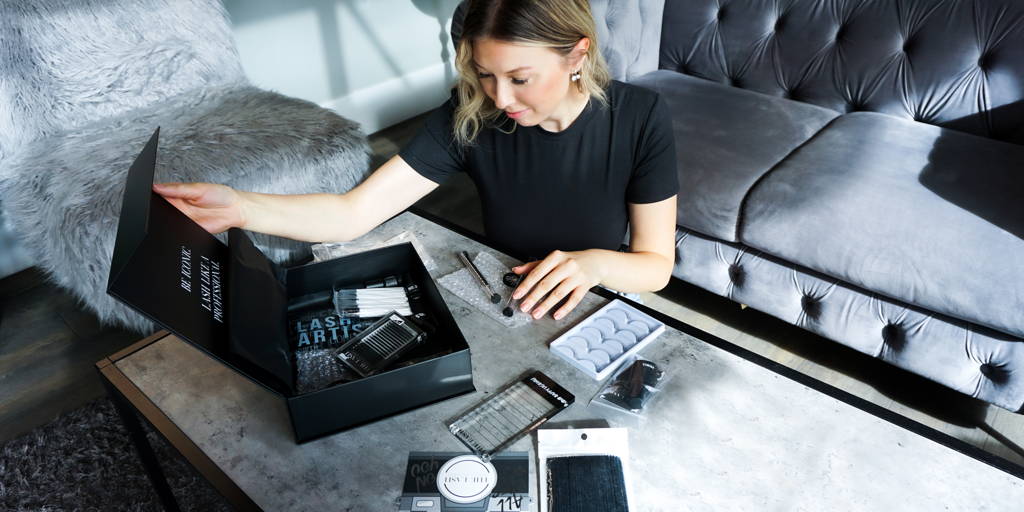
Do you know what time it is? Time for another educational, yet fun lash lesson from your BFF! This time we’re talking about lash extension kit essentials. That’s right. We’re covering the lash essentials that you need in your arsenal.
When looking at an eyelash extension training course, make sure the lash extension kit offered includes the items below. If the course you’re looking for doesn’t offer an eyelash extension kit and is priced similarly to other courses, pick another course, baby.
While education is important, hands-on practice is what will turn you into a lash master. If you can’t practice the skill you’re learning with real-life lash tools, what’s the point?
For the path to creating your best eyelash extension kit, read below!
8 Eyelash Extension Kit Essentials
Eyelash Trays
A quality lash extension kit will include the most important lash supply—lashes, duh. This goes for both classic and volume courses. Ideally, you’ll receive multiple trays with a variety of lash lengths. Diameter variety isn’t so important in this case, because you’ll want to focus on making sure lashes are the right lengths for your clients and their natural lash health. Once you can lash with one diameter, you can lash with them all.
We want lashes that last. So lash adhesive is a must-have. How else will you secure lashes and create amazing looks for clients? Make sure that the eyelash extension kit you’re purchasing includes an adhesive that matches your skill level. If you’re a brand new lash artist and are just starting in a classic course, you’ll probably want a slow-drying adhesive while learning. This allows for mistakes to be easily corrected. But, if you’ve been lashing for a while and want to up your game with a volume course, you’ll probably be safe using a pro adhesive that dries in one second or less.
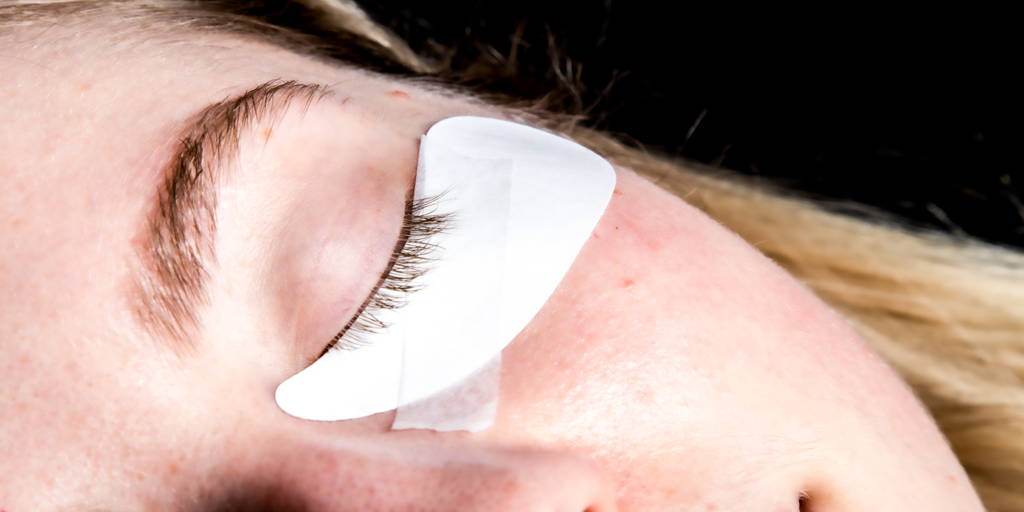
Safety first! Eye pads and tape are essential to lashing, so let’s make them part of the routine. Eye pads protect the sensitive skin under a client’s eyes while eye tape keeps the bottom lashes down so that they don’t get glued to the lashes you’re extending, causing a lash disaster! Whether they’re standard eye pads, gel pads, paper tape, or plastic tape, your kit should include at least one of these products.
To prime or not to prime? Primer is an essential part of a lash extension kit because it’s an important step for preparing the lids of many clients. There are certain cases to avoid using lash extension primer like when a client has very dry skin. But the majority of the time, primer is a useful way to get the lids ready for the royal lash treatment. Make sure you understand the do’s and don’ts of lash extension primer, so you know when to reach for your bottle and when to skip it!
Eyelash brushes are another must-have lash essential. Eyelash brushes are your best friend when it comes to making sure the lashes are good to go. The best way to check your work is to give the lashes a quick brush-through to see if they’re even or if there are any gaps. Lash brushes will also catch any stray lashes, giving you a heads-up that you may need to use a little more adhesive. Those little eyelash brushes are helpful tools that deserve a spot in every eyelash extension kit.
You have to apply the lashes with something, right?! Every lash artist uses different tweezers for different things. As you grow your skills, you’ll experiment with different tweezer types to learn what suits your lashing style. Ultimately, you’re going to have a preference that might not be what your kit comes with. However, if it’s a quality kit, it will come with tweezers that the company believes will benefit you on your lashing journey. Volume course kits should come with some type of volume tweezers, though!
Practice makes perfect (lashes)! Taking models right away probably isn’t the greatest move. You’re going to make mistakes, which is fine. But it’s best not to make those mistakes at the expense of someone’s eyes! A quality kit will include some practice strip lasheson which you can practice your first few sets. That way, you can gain confidence and speed in your application technique before moving onto the real deal.
Learning how to remove eyelash extensions is also an important part of your lash education. When it’s time for a clean slate, a lash removing solution is just what you need. Make sure the remover you select contains gentle ingredients that promote healthy natural lashes. An effective lash extension remover will break down the adhesive bonds so that the lashes slide off easily.
Gathering all the lash essentials for your best eyelash extension kit can be time-consuming, and time is money, babe! Plus, finding quality products you can trust, and ordering supplies separately won’t be cheap. Luckily, you can find a high-quality lash extension kit with everything you need. Save yourself the stress and pick up a kit designed by a professional in the lash industry. Here are a few ideas:
- If you’re looking for a course with bomb a*s kits, check out The Lash Professional.
- If you’re just looking for a kit that has everything you need, check out our Professional Eyelash Extension Kits or Sugarlash PRO.
With a solid lash education, lots of practice and the right tools in your eyelash extension kit, you’ll be lashing with the best of them in no time. Best of luck, beautiful!

How to Practice Eyelash Extensions On Your Own
How to Practice Eyelash Extensions On Your Own
August 27, 2020 by The Lash Professional.

Whether you’re a brand new lash artist or a seasoned lash professional, it’s never a bad idea to get lash practice under your belt. After all, practice makes perfect (lashes). Here’s how to practice eyelash extensions from the comfort of your own home.
Practicing eyelash extensions opens doors for lash artists
Ask any girl boss how she got to the top, and she’ll tell you hard work is involved every step of the way. Through hard work, our fearless founder Vanessa created The Lash Professional that brings together women with a passion for lashes. Through hard work, you’ll improve your lash extension application technique and set yourself apart from other lash artists.
Practicing eyelash extensions is like investing in your future as a lash artist. As you practice and improve your technique, you’ll grow more confident in your skills. In a competitive industry, it’s important to establish yourself as a skilled lash technician. A confident lash artist is not afraid to put herself out there, share her business card, rent a studio location and even raise prices. By refining your lash skills, you’re setting yourself up for future success.
Another advantage of practicing eyelashes extensions is that your growing skills work as a marketing tool for your business. Think about it. If you’re providing top-notch eyelash extension services, then clients are more likely to recommend you to their friends, coworkers and other lash lovers in their lives.
A mediocre eyelash extension application won’t leave anyone wanting to gush about your services. But with lots of practice, your extension game will be worthy of Instagram posts and brunch conversations. To sum it up, attracting new lash clients becomes more natural when your work speaks for itself.
How can I practice eyelash extensions at home?
So, how can lash babes like us improve our skills? By learning how to practice eyelash extensions at home! Once you have the basics down from a lash extension class, you can put that knowledge to test with at-home practice. Here’s how:
Get all the tools you need in one place with an eyelash extension kit. Many eyelash training courses come with a starter lash extension kit. This will include lash essentials like:
- Lash extensions
- Tweezers
- Lash tape
- Primer
- Remover
With an education from a professional lash artist and a fully stocked practice eyelash extension kit, you’ll be prepared to rock the lash world. The more you practice applying lash extensions, the more familiar you’ll become with your tools.
If you’re wondering “how can I practice lash extensions at home?”, setting up a little area is a great place to start. In this designated lash area, place an eyelash extension mannequin training head along with your lash application tools. You can keep this area neat and glam looking with an acrylic storage container.
If you have a lash bed or chair that reclines, use this as a base for practicing.
Now it’s time to lay on the lashes. A helpful tip for beginner lash artists is to practice applying lashes on a sponge. You may be thinking this sounds crazy, but hear us out!
A sponge allows you to see the attachments and bases clearly as you place each lash inside. You can practice angle placement and become more precise in your application on an everyday makeup sponge.
Of course, a sponge does not capture the multiple layers of lashes that a client has or the eyelid curve. But practicing on one can help you become more consistent with your placement.
An eyelash extension mannequin training head is the closest thing to a real person. So this is an awesome tool for practicing.
Set the mannequin head on the lash bed or chair; then, examine your posture. Here are some tips to avoid straining your head, neck and back when placing lash extensions.
- Place the mannequin head (aka the client) as close to you as possible to avoid leaning over them and hurting your back.
- Position the lashing bed (or chair) and your adjustable stool at a height where you can sit straight upright.
- Keep both feet on the floor, straddling the bed.
Just like you practice your lash application, you’ll need to practice correct posture. You can learn more about health tips for lash artists here.
We won’t not sugar coat it. It will take time for you to become a skilled and confident lasher. There is no overnight transformation from novice to bonafide lash professional. But with consistent practice, you’ll grow your skills and your client base!
The Lash Professional is here to provide you with the information and tools you need to become a successful lash artist. From advice on how to build a profitable lash business to guides on creating the lash look your clients want, we’re your lash bestie through thick and thin.
Check out our classes for more information about lash application and an online training course that you can complete from home. Here’s to chasing dreams with full lashes!
How can I practice eyelash extensions at home?
So, how can lash babes like us improve our skills? By learning how to practice eyelash extensions at home! Once you have the basics down from a lash extension class, you can put that knowledge to test with at-home practice. Here’s how:
Get all the tools you need in one place with an eyelash extension kit. Many eyelash training courses come with a starter lash extension kit. This will include lash essentials like:
- Lash extensions
- Tweezers
- Lash tape
- Primer
- Remover
With an education from a professional lash artist and a fully stocked practice eyelash extension kit, you’ll be prepared to rock the lash world. The more you practice applying lash extensions, the more familiar you’ll become with your tools.
If you’re wondering “how can I practice lash extensions at home?”, setting up a little area is a great place to start. In this designated lash area, place an eyelash extension mannequin training head along with your lash application tools. You can keep this area neat and glam looking with an acrylic storage container.
If you have a lash bed or chair that reclines, use this as a base for practicing.
Now it’s time to lay on the lashes. A helpful tip for beginner lash artists is to practice applying lashes on a sponge. You may be thinking this sounds crazy, but hear us out!
A sponge allows you to see the attachments and bases clearly as you place each lash inside. You can practice angle placement and become more precise in your application on an everyday makeup sponge.
Of course, a sponge does not capture the multiple layers of lashes that a client has or the eyelid curve. But practicing on one can help you become more consistent with your placement.
An eyelash extension mannequin training head is the closest thing to a real person. So this is an awesome tool for practicing.
Set the mannequin head on the lash bed or chair; then, examine your posture. Here are some tips to avoid straining your head, neck and back when placing lash extensions.
- Place the mannequin head (aka the client) as close to you as possible to avoid leaning over them and hurting your back.
- Position the lashing bed (or chair) and your adjustable stool at a height where you can sit straight upright.
- Keep both feet on the floor, straddling the bed.
Just like you practice your lash application, you’ll need to practice correct posture. You can learn more about health tips for lash artists here.
Rock the lash world, one set at a time
We won’t not sugar coat it. It will take time for you to become a skilled and confident lasher. There is no overnight transformation from novice to bonafide lash professional. But with consistent practice, you’ll grow your skills and your client base!
The Lash Professional is here to provide you with the information and tools you need to become a successful lash artist. From advice on how to build a profitable lash business to guides on creating the lash look your clients want, we’re your lash bestie through thick and thin.
Check out our classes for more information about lash application and an online training course that you can complete from home. Here’s to chasing dreams with full lashes!

Will Eyelash Extensions Ruin Your Natural Lashes?
Will Eyelash Extensions Ruin Your Natural Lashes?
September 16, 2020 by The Lash Professional.
Sometimes, your natural lashes need a little va-va-voom. Lash extensions add length and volume in a way that even the best mascara can’t achieve. But do eyelash extensions ruin your natural lashes? Whether you're a lash tech who gets asked this by clients or you are curious about getting a new set of lashes for yourself, we’ve got answers for you.
Losing precious lashes sounds like a beauty disaster! Take a deep breath. The truth is natural lashes fall out regularly. The natural life cycle for eyelashes includes three phases—growth, transition and resting. At the end of the resting phase, the lash falls out and is replaced by a new lash.
When you get lash extensions, the cycle continues as normal. Because each lash extension is connected to a natural lash, your extensions fall out in the same cycle as your natural lashes. If a client asks, “Will my eyelashes grow back after eyelash extensions?” you can assure them that the lashes continue to grow even when extensions are on. It is all part of the lash growth cycle.
So, do eyelash extensions make your eyelashes fall out? No, natural lashes shed every day, and the loss of 3-5 natural lashes a day is normal. Keep in mind that natural lashes will shed with their extension as they are attached! If you experience excessive loss of lashes, then the lash extensions may be to blame.
If an inexperienced lash technician applies lashes to more than one natural lash, you may see clumps of lashes shedding, which is so unnecessary. To avoid this, make sure you are visiting a lash professional!
NO. Lash extensions absolutely should not ruin your natural lashes. Actually, natural lashes only become damaged from extensions if they are applied incorrectly! There are also a couple of practices to keep in mind so that your natural lashes stay nice and healthy:
- Don’t rub or tug at your lash extensions. This can cause stress or damage to the natural lashes below. Plus, the natural oils on your skin will break down the adhesive, meaning your luscious lashes won’t last as long.
- Research before selecting a lash studio. Before you trust someone to go near your eyes with tweezers, make sure they know what they’re doing. With a skilled lash technician placing each extension, you won’t have to worry about ruining your natural lashes. Need ideas for lash locations? Read about top lash studios in cities across the US on our blog.
- Find the right adhesive. The type of lash glue used can have an impact on the state of natural lashes.
If you are a lash technician, be sure to ask each client about any allergies or sensitivities. If they are unsure, watch for signs of irritation during the application, since this may indicate that it’s best to switch to another type of adhesive.
If you are a client, be vocal about your concerns from the start. Let your lash tech know about sensitivities you have to certain lash glue. If you begin to feel pain or discomfort during the lash application process, let your technician know right away. Having irritated eyes leads to lots of rubbing and tugging that could damage natural lashes.
By a show of hands, who wants long lashes? Everyone? We’re not surprised! Long lashes are always in style, and the fear of losing length due to extensions is understandable. So let’s address the common question, “do eyelash extensions make your natural lashes shorter?”
Your natural lash length won’t experience harm if two aspects of your lash routine are in place. One: you’re being gentle and kind to your lash extensions. Two: a well-trained lash technician applies your lashes.
Proper lash extension care is important because it ensures your lashes are well-taken care of. By washing lashes daily and staying away from damaging heat and oils, you protect your lashes from premature shedding. Since you won’t need mascara, you won’t need to tug at your lash line with makeup remover. This is a benefit to your natural lashes as it shields them from excessive rubbing.
Secondly, an improper lash extension application can lead to natural lashes being weighed down. This can give way to weak and brittle lashes. Yikes! Protect your natural lashes and get the best lash extension results possible by visiting a highly rated lash studio.
Don’t worry, babe, lash extensions are worth it because you’re worth it.


How to Do Eyelash Extensions for Asian Eye Shapes
How to Do Eyelash Extensions for Asian Eye Shapes
December 3, 2020 by The Lash Professional.
Take a look around a room or a scroll through Instagram and it’s obvious—eyes come in many shapes and sizes. This means that lash extension application is not a one-size-fits-all process.
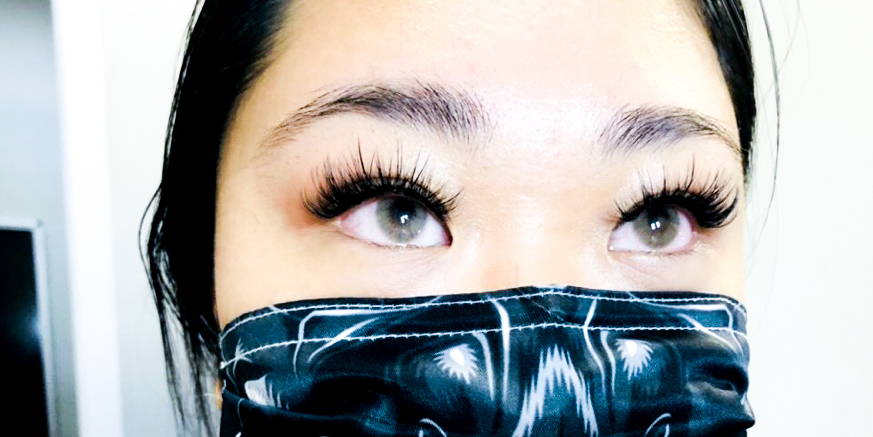
Asian eye shapes require a unique lash extension approach. To achieve a flattering look that opens the eyes and enhances the natural features, it’s important to know the proper application of Asian eyelash extensions.
From eyelid types to proper application techniques, this guide is just what you need. We hope you’re ready; let’s answer your most pressing question about eyelash extensions for Asian eyes!
What is a monolid?
One common feature of Asian eye shapes is a monolid. Eyes with monolids leave a flat surface above the eye, unlike eyes that have a fold along the lid. The lack of a crease causes the whole eyelid to disappear under the crease when a client opens their eyes. This means that strategic lash application is key. Before we get into the proper technique, let’s take a peek at one more eyelid type you may come across.
What are hooded eyes?
In some cases, a client will not have a monolid. Instead, they may have hooded eyes. Hooded eyes are similar to monolids, but there is a difference between the two. Hooded eyes have a crease of skin that cover the eyelid.
In some eyes, this part of skin will completely cover the lid. In other cases, the fold will just cover a part of the eyelid. Either way, this extra portion of skin can contribute to the appearance of a smaller looking eye shape. The way you apply eyelash extensions for hooded eyes can help to correct this and open the eyes.
Do’s and Don’ts of Applying Lash Extensions on Asian Eyes
While no two clients are exactly alike, there are some typical characteristics of monolids that lash professionals need to know. For the do’s and don’ts, read on, babe.
Because monolids leave no fold of separation between the eye and the lid, the transfer of natural oils to the lash extensions will happen more quickly than with other eyelid shapes.
To help lashes last longer, be sure to prime the lashes at the start. Then seal with a nano mister at the end. Be sure to educate the client on proper aftercare techniques so they can enjoy lush lashes for a longer period.
Placing eyelash extension tape too far from the lash line won’t effectively lift and open the eye. Instead, tape close to the lash line so that the inner lashes are easier to work on. You’ll thank us later.
When selecting lash length, remember that the top portion of lashes will be hidden under the monolid. You don’t want the client to open her eyes and have short lashes! Since you know that a lot of the lash won’t be visible when the eyes are open, select longer lashes that will show up. Just remember not to grab lashes that are more than 2-3 mm longer than the client’s natural lash.
Ah, the J curl. It’s natural and beautiful. But guess what? The best eyelash extensions for Asian eyes don’t include this curl type. Asian eyes typically have straighter lashes that slant downward. A J curl is not the best option for opening up eyes with a monolid.
This is because a J curl is straight at the base and only has a slight curl at the end. The straight base will end up overwhelming Asian eye shapes, leading to a smaller look-the opposite of what we’re going for! For the right curl, read below!
Best Eyelash Extensions for Asian Eye Shapes
The Lash Curl
Okay, lovely lasher, we’ve made it to the curl selection portion. We know that the J curl is a no go. But what are the options? An L curl is a great option for Asian eyelash extensions since this curl can open up lashes that naturally point downward. We love the classic L curl lashesthat come in a multi-length option so you can create tailored looks! Another option is a D curl which works well on clients with a downturned eye shape. For more tips on choosing the lash curl, check out our guide to choosing lash curls.
The ideal Asian eyelash extension style is what we like to call ‘The Reversed’. The Reverse style has an emphasis section that is located close to the inner corner. This might sound weird, but the Reverse is seriously perfect for correcting monolids or wide-set eyes. By placing the emphasis closer to the inner part of the eye, you open up the lid for a beautiful result.
Learn to Lash Like a Pro
Learning to apply eyelash extensions for hooded eyes is just one step on the road to becoming a successful lash artist.
To pick up serious lash skills that will impress clients of all eye shapes, it’s time to get serious about your lash education. Good news: The Lash Professional is here to help! With online and in-person lash training options, becoming a boss lash babe just got easier.
Browse our lash extension courses today to boost your skills and grow your client list!
