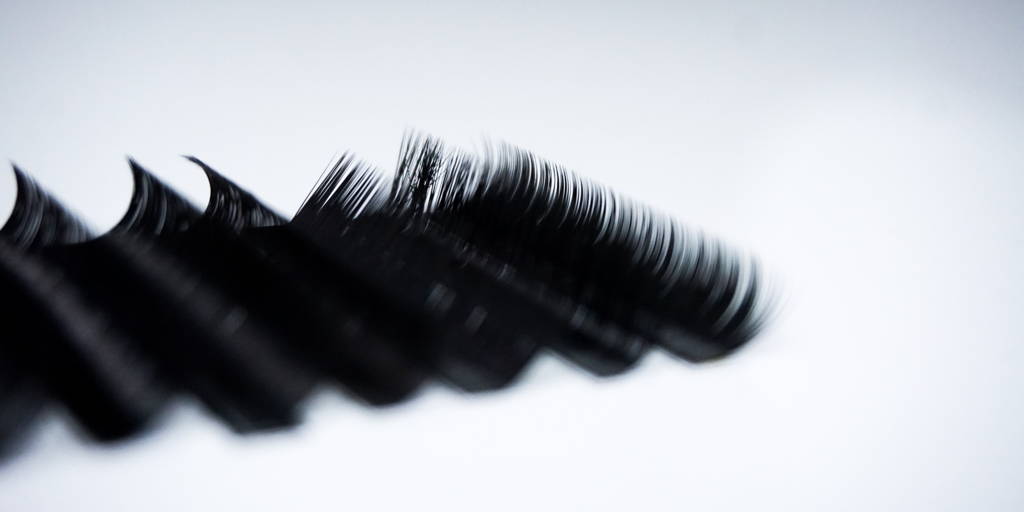
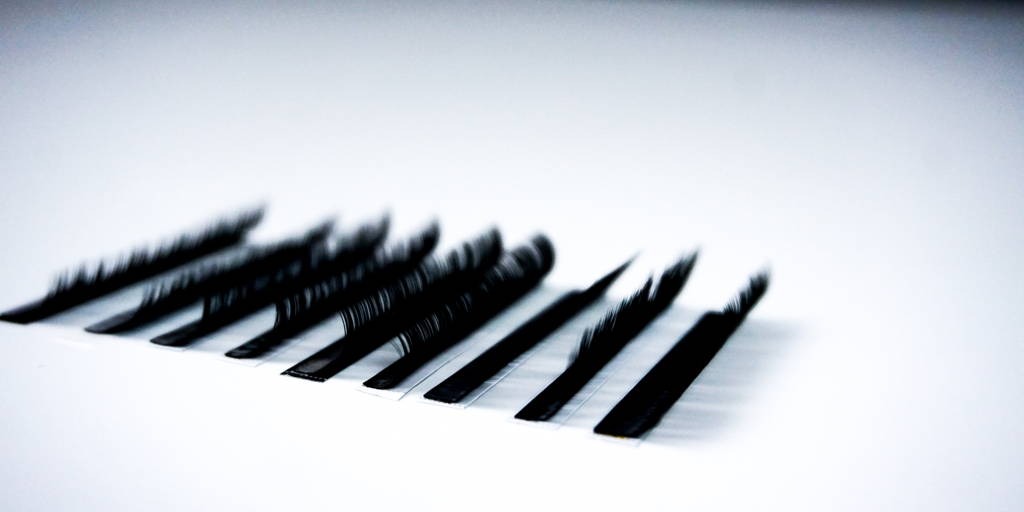
Length, diameter, and curls—oh my! With so many options available in the eyelash extension market, you can create innovative lash looks for each client.
Before you flex your lashing skills, though, you need to know the differences between lashes to match clients their dream lash looks.
We’ve got your back when it comes to all things in lashing! By the end of this article, you’ll be one step closer to becoming a lashing master.
To get started, we’re going to take you through what makes C vs CC curl eyelash extensions special so you can use them with style!
C vs CC Curl: Embrace Your Curves
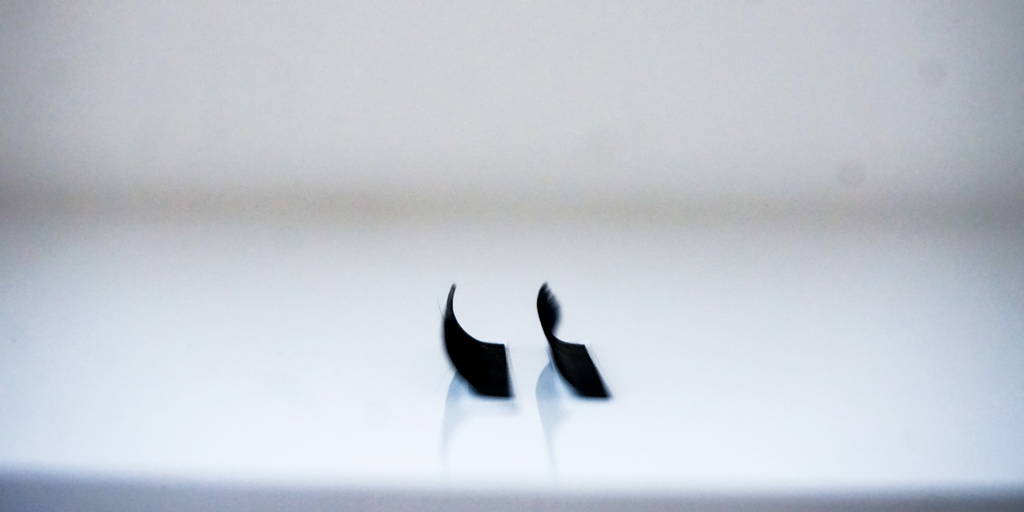
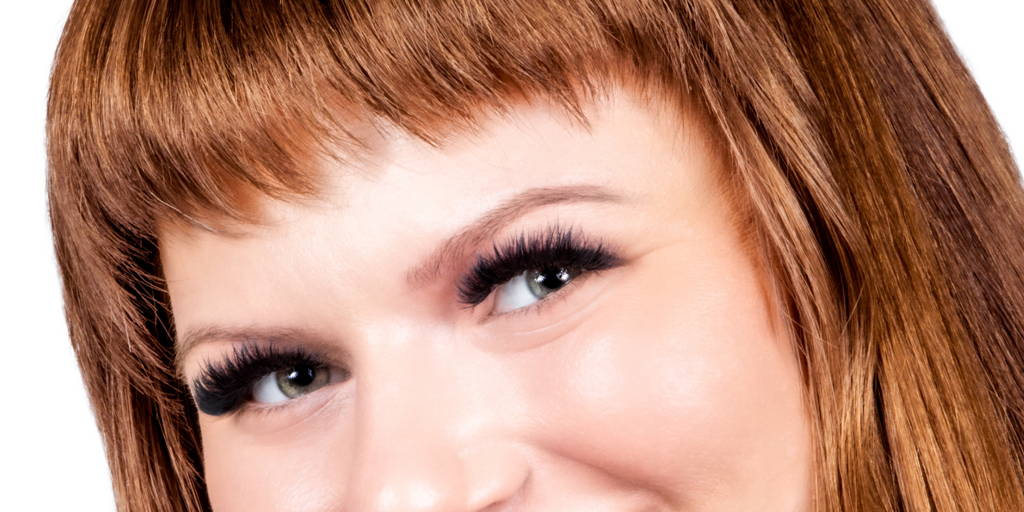
C Curl
With a lovely balance between drama and natural beauty, the C Curl eyelash extension serves looks—all without makeup!
The C Curl is one of the most popular eyelash extensions on the market—and for good reason! This eyelash extension provides a naturally curled look with just a dash of drama.
With a curl that flows quickly from its straight base, this curl creates an open-eyed look for any eye shape.
Quick and dirty: For clients who want an open, lifted look, the C Curl eyelash extension can help them achieve those lovely lash dreams!
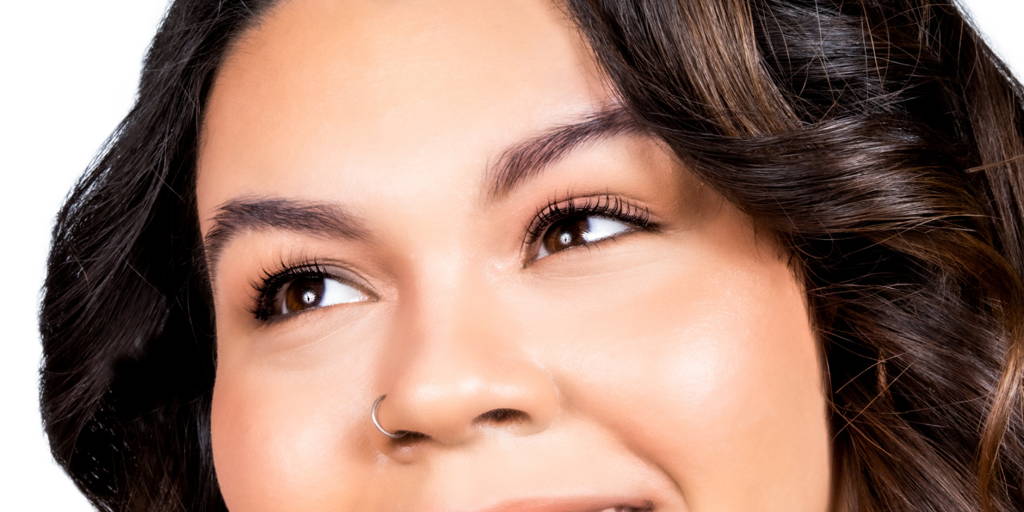
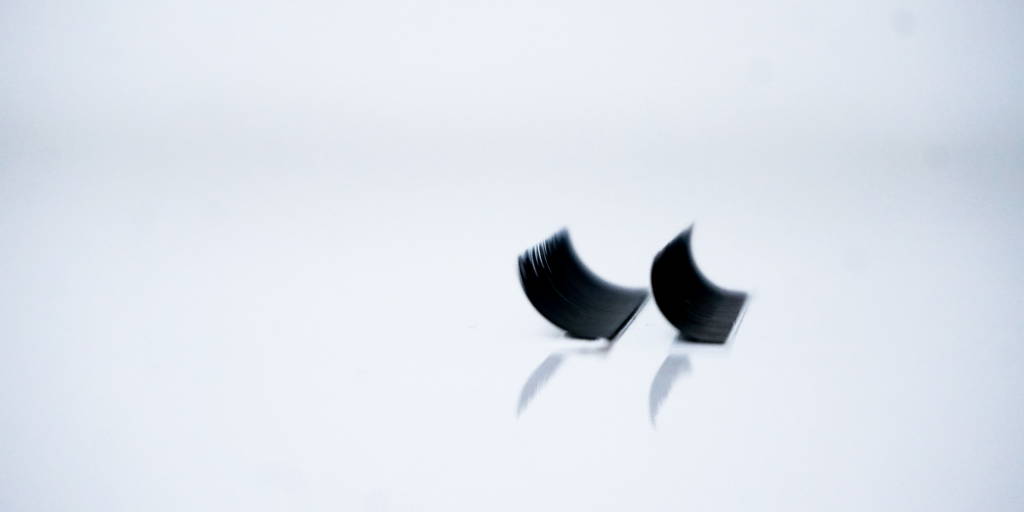
CC Curl
Just like the name implies, the CC Curl eyelash extension is like the C Curl but with a more dramatic flair!
The CC Curl starts with a similar base to the C Curl. However, when it comes to the curl itself, the CC Curl changes things up with a more extreme curl.
Why does this difference matter? With its dramatic curl, the CC Curl can give your client a more visible and unmistakable lash.
So, if you have a client who wants to turn heads with a set of volume eyelash extensions, the CC Curl is the gift that keeps on giving!
Quick and dirty: For clients who want to turn up the volume, the CC Curl eyelash extension amplifies their natural beauty!
Unleash Your Inner Lash Boss
Lash babes, that was our exclusive overview of the differences between C vs CC Curl eyelash extensions. If you love lashing like we do (and we know you do!) then you’re probably dying to learn more.
Luckily, you can learn all the lash techniques you desire and more with The Lash Professional! Side by side with our talented team of lash bosses who lead our lash training program, you’ll learn how to give your clients the best lash looks they’ve ever seen!
Now, for all our hustlers who can’t make an in-person class, we’ve got you covered. With our online training program, you can make your way through your busy day while learning how to lash at your pace. Need a break from the hustle? That’s the perfect moment to squeeze in a lashing lesson!
So, future lash bosses, what are you waiting for? Join The Lash Professionals for their next training and get your lashing groove on!
Lash envy. Let’s be real, we’ve all been there. You see a bad a** set of lashes and wish you had those beauties. Girl, you can, and there are so many options! The world of lashes awaits you. But wait…there are so many options. Eyelash extensions vs lash lifts? What’s the difference? Lucky for you, we’re here to answer all of your questions!
Eyelash Extensions vs Lash Lifts: Lash Lift Breakdown
Simply put, a lash lift is like a perm for your lashes. Imagine if you only had to use your eyelash curler every six to eight weeks. Amazing, right? That’s exactly what a lash lift does. The curl size is customizable, which is great because everyone’s eyes and lashes are different! One thing to note is that lash lifts are a chemical service.
Lash Lift Pros
There are so many great things about lash lifts. Since lash lifts just curl your natural lashes using lash rodsand lash lift glue, you can continue life as normal. They are incredibly low maintenance.
Worried about water? Not you! (after the first 24 hours) Treat yourself (you deserve it!) to a lash tint after your lift, or keep using your favorite mascara. Keep your oil-based products! They won't hurt your lashes. Your friends will wish they had your "natural" lashes. You're busy. Good thing lash lifts typically take half the time of a full set of extensions. Everyone's eyes are unique, but lash lifts suit anyone. They are customizable by curl and shape. Lash lifts last six to eight weeks. Your wallet will be happy. Lifts cost half the price of extensions.
Lash Lift Cons
Lifts don’t make your lashes darker.
Eyelash Extensions vs Lash Lifts: Lash Extension Breakdown
Eyelash extensions are small, synthetic fibers that are attached to the base of your natural eyelash. If you like the falsie look, these are definitely a great option for you! The curl size, length, and shape are customizable, which is great if you know what kind of style you like already.
Lash Extension Pros
Eyelash extensions are great if you want a more dramatic look daily. Since extensions are applied directly to your natural lash, it can make it look like you have way more lashes than you actually do. And who doesn’t want double the lashes?
Eyelash extensions are customizable to your lashes and your eye shape. Most salons offer classic and volume lashes, depending on whether you're going for a natural or dramatic look.
Lash extensions last anywhere from two to four weeks (when applied correctly). Put your wallet away because you won't be shelling out money for mascara anymore!
Lash Extension Cons
Eyelash extensions typically cost more than lash lifts.
Application can take up to two hours. Say goodbye to your oil-based products. Oil can break down the lash extension adhesive. Exercise cautious around steam and water (especially for the first 24 hours). Touching or rubbing your eyes is a no-no! Sorry stomach-sleepers! Sleeping like this can damage your lashes.
There you go lash babes! It is totally possible for you to have the lashes of your dreams on your terms, so go out there and get them.
If you’re located in Arizona, call our lash bosses at The Lash and Sugar Company to book your extension appointment today!
Otherwise, be sure to check out our “10 Best” blogs for the scoop on the best places to get bomb lashes.
Nice to see you again, lash boss. If you're here, you're probably curious about what products are necessary for a lash lift, and what the products do. As always, I'm here to help a girl out! There are a few different steps in a lash lift, but for the most part, lash lift supplies are pretty simple.
Think of lash lift rods as hair curlers for your eyelashes. The rods are what the lashes mold to in order to curl. So, as you can imagine, not every single person can use the same size rod, which is why there are different sizes! These come in small, medium, and large. You can vary the usage of these depending not only on the length of your client's lashes, but the look that they want. The most popular size is small, because it gives clients the tightest curl out of the three rods. If a client has really short lashes, the small rod would probably be best for them. The lash lift rod adheres to the top of the client's eyelid, just above their lash line.
Your client's lashes need to stick to the rod somehow, and this is where lash lift glue comes in. It's pretty straightforward. You apply the special lash lift glue to the lash lift rod, and use curved tweezers or another eye-safe tool to adhere your client's lashes to the rod. This may seem self-explanatory, but it's important that you only ever use a lash lift-specific glue for this, because it's safe on lashes and skin.
The lash lift lotion creates the curl. Think of a hair curling iron. The iron creates the shape, just like our lash lift rod. The heat creates the curl. In this case, the lift lotion is the heat!
Set
The lash setting lotion is what keeps the curl in place once the glue and rod is removed. Continuing on with our curling iron metaphor, the setting lotion is the hairspray that holds the curls in place. Without the setting lotion, the lashes wouldn't hold the curl for as long as it's supposed to (6-8 weeks).
Nourish
The most important thing, no matter what, is making sure that your client's lashes are not damaged from the services that you're providing. The lash nourish lotion will seal the cuticles of the lashes and moisturize them. We've all fried our hair before, whether it was from bleach or too much heat. It sucks. Don't put anyone's lashes through that! Nourish!
All of these lotions can be applied with microbrushes. Microbrushes are just really tiny brushes that help product get between lashes. Along with microbrushes, another product that you should use during any kind of lash service are eyepads. Eyepads protect the lower lashes and the skin underneath a client's eyes during a service.
Now that you know the basics of lash lift supplies, maybe you want to further your bad-a*sery and take a lash lift training course. Lash lifts are a great, more natural alternative for a lot of people, so it's always beneficial to be able to offer clients a range of services.
Favorite Eyelash Application Tips From Lash Experts
October 10, 2019 by The Lash Professional.
Lash babes, the eyelash extension guide you've all been asking for is finally here. We've put together the most exclusive tips from our favorite lash experts, from what eyelash extensions are to curl, color, and more.
With all these glamorous tips in one place, learning how to lash has never been easier! So, what are you waiting for? Grab your eyelash extension kit and let's get started!
The Lash Professional's Official Eyelash Extension Guide
What Are Eyelash Extensions?
There is no better place to start this guide off than by explaining what eyelash extensions are. Whether you're brand new to the lashing game or could use a refresher, we've got you covered!
In short, eyelash extensions are thin fibers that are meant to resemble natural eyelashes. They're attached to your natural eyelash line using semi-permanent adhesive to create the appearance of fuller and longer eyelashes.
How Do Eyelash Extensions Work?
Eyelash extension application is a delicate procedure that should only be performed by alicensed eyelash technician. Nonetheless, for this eyelash extension guide, we’re giving you the quick and dirty of how eyelash extensions work.
Discuss with the client about their expectations and preferred eyelash look.
Use your eyelash extension knowledge and experience to design flattering lash looks expertly.
Generally, an eyelash extension is applied to a single natural lash to create a fresh-eyed appearance. In some cases, multiple extensions are applied to a natural lash to create fuller, more dramatic looks. We’ll talk more about this later!
Babes, by no means, is this a complete rundown of eyelash extensions. You’ll just have to attend our hands-on eyelash extension course in Phoenix to learn that information! However, it’s our quick rundown of the eyelash extension process.
Types of Eyelash Extensions
Now that you know a little bit more about how eyelash extensions work let's dive into types of eyelash extensions. It wouldn't be an eyelash extension guide without showing you the many different types of jaw-dropping lash looks you can make!
Types of Eyelash Extensions: Curls
Options are the name of the game when it comes to eyelash extensions. There are a plethora of eyelash extension curls that flatter each client’s unique eye shape and preferred eyelash look. Keep reading to learn about the most popular lash options.
J Curl:The J curl lash is the naturalista’s best friend! The J curl lash is the most natural-looking lash that resembles the client’s eyelash. Overall, the J curl adds considerable volume and length without appearing too dramatic.
B Curl: The B curl lash is another natural-looking eyelash extension. This lash is slightly curlier than the J curl lash and has the appearance of a lash that has been curled with an eyelash curler. This eyelash extension is not recommended for clients with straight or downward pointed lashes.
C Curl: The C curl is the lash that keeps giving! This lash can be used in dramatic or natural lash extension sets. In addition, the C curl creates the appearance of more lifted and open eyes for on-the-go clients.
D Curl: D curl—a.k.a ‘Doll Eye’—is the curliest eyelash extension on the market. This lash is for clients who embody sass and drama!
L+ Curl: The L+ curl is for the gutsiest of clients that want more va va voom! This eyelash extension is known as the ‘Barbie’ lash for a good reason—the L+ curl achieves maximum lift and volume!
Ultimately, a combination of lashes is the best way to go when creating head turning lash looks.
The lashes don’t stop there! Keep reading to learn about lashes, lashes, and more lashes!
Types of Eyelash Extensions: Classic vs. Volume
We've already touched a bit on what volume eyelash extensions are, but let's go into the juicy details! When talking about classic vs. volume eyelashes, we're really talking about the technique you use when applying lash extensions.
To elaborate, the classic eyelash extension technique requires the technician to apply one lash extension to a single natural lash. Typically, this technique is used on clients that want a simple, everyday lash.
In comparison, a lash technician will apply multiple extensions to a single natural lash to create a fuller appearance. These are not eyelashes for the faint of heart! Volume eyelashes are made for clients who want to harness the bold lash boss inside of them.
Types of Eyelash Extensions: Colors
If you thought that eyelash extensions only came in black, think again!
Colored eyelash extensions are a trend you do not want to miss. Create bold, show-stopping looks with avariety of colored lashes that put the ‘drama’ in ‘dramatic.’
Don’t get it twisted—colored lashes aren’t just statement embellishments! Colored lashes are also sneaky tricks that experienced eyelash extension technicians use to complement a client’s eye color.
For example, a smattering of green eyelash extensions can make your brown, hazel, and green-eyed beauties pop!
All in all, yourprofessional eyelash extensions kit is not complete without the unique charm these colored eyelash extensions provide your clients.
Eyelash Extension Care
Tell your girlfriends, your family, and especially your clients that aftercare is important! If you’ve done your job right, your clients will leave the salon with eyelashes to die for. Nonetheless, it is up to the client afterward to maintain their eyelash extensions. The following are our top tips technicians should communicate to their client to keeping fresh-looking extension and, in some cases, extend the life of lash extensions:
Avoid excess oils in common makeup products like mascara that can break down lash glue.
Avoid excess moisture. This doesn't mean to alter your regular hygiene routine; however, it does mean to skip the steam facial and opt for a relaxing mud mask.
Schedule regular lash refills to maintain the voluminous appearance of the extensions.
All in all, a regimented aftercare routine will allow clients to get the most out of their lash extensions. Remind your client often after appointment care to encourage positive habits. Even better, create an eyelash extension business card with lash aftercare tips on the back.
Eyelash Extension Supplies
We have some pearly gems of truth to drop that may surprise a few of you. Truth is you are only as good as your eyelash extension supplies. If you’ve ever tried applying lashes with ineffective glue or unusable tweezers, then you know what we mean.
That said, we’re here with a quick rundown of eyelash extension supplies that you’ll need to lash like a pro.
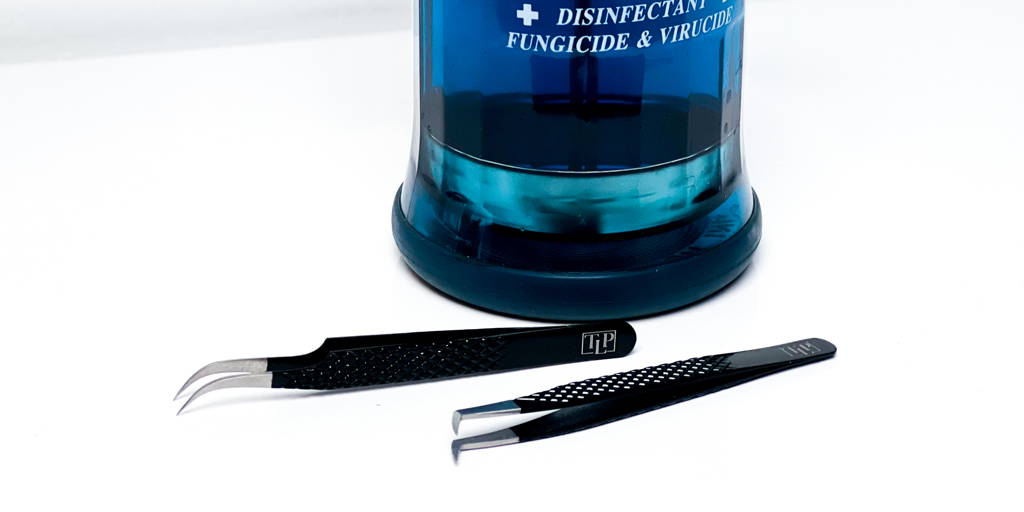
Hey, lash artist babes, we’re going to give it to you straight. Without the right professional eyelash tweezers in your eyelash extension kit, you are not performing to the best of your ability.
And, frankly, there’s not an artistic vision or pristine lashing technique that will make up for a low-quality pair of tweezers.
With that said, today, we’re educating you on the many types of professional eyelash tweezers that lash technicians use to create daring looks.
We’ve put together this guide on the different types of professional eyelash tweezers to help you decide which needs to be a part of your lash extension kit. By the end of this, you’ll know the ins and outs of lash tweezers and their many functions.
8 Types of Professional Eyelash Tweezers
1. Straight Lash Tweezer
To begin, we’re starting with a basic tweezer that you may be familiar with: the straight lash tweezer!
These tweezers are exactly what they sound like.
Straight lash tweezers are long and narrow, ending with a tapered point. For our ferocious eyebrow pluckers, these closely resemble a traditional tweezer.
These straight tweezers are made for picking up eyelash extensions with ease! Don’t worry about dropping those precious lashes, either — the tips of this tweezer are aligned perfectly to ensure the firmest grip possible.
2. Pointed Straight Lash Tweezer
The pointed straight lash tweezer is your go-to lash tool when it comes to lash isolation. These tweezers isolate the client’s natural lashes right to prevent clumpy, unattractive lashes. Nobody wants that.
This tweezer looks similar to the straight lash tweezer. However, the pointed straight lash tweezer has a more sudden curve that tapers to a point, while the straight lash tweezer gradually comes to its pointed tip.
3. Isolation Lash Tweezers
The isolation lash tweezer helps you keep natural lashes isolated as you lash on the perfect look. As you hold this tweezer in your non-dominant hand, you can use another professional eyelash tweezer in your other hand to carefully attach lash extensions for your clients.
An isolation tweezer has a slight curve located on its underside. This curve allows for perfect isolation that is closer to the client’s eyelid. Basically, you don’t have to worry about losing an isolated lash with this excellent tool.
4. Pointed Curve Lash Tweezers
If you’re looking for a versatile professional eyelash tweezer, then this is the one for you, ladies! When it comes to the classic vs. volume eyelash extensions debate, you don’t have to pick a side.
The pointed curve lash tweezer’s short base allows for a firm grip. In turn, this makes it easy to pick up multiple lashes for a full-on volume fan. Or, if you need tweezers for classic lashing, these tweezers are a handy tool!
5. Pointed Edge Lash Tweezers
Professional eyelash tweezers in action!
The pointed edge lash tweezer is just as handy as its curved relative! This means you can use a pointed edge lash tweezer for the right volume look or lay down some classic lash style with ease.
A pointed edge lash tweezer curves in slightly before curving back with its angled tips.
6. Curved Lash Tweezers
When creating an eye-catching volume eyelash look, these curved lash tweezers are your go-to tool. These tweezers have a more gradual curve to their tip, resembling the letter J, which is why they’re also known as J tweezers.
The curved lash tweezer gives you some extra room in that “sweet spot” to make creating a volume fan easier! In addition, its precision tip allows the right amount of resistance for the best set of volume lashes.
7. Volume Lash Tweezers
When it comes to volume eyelash extensions, it feels good to have control. Control over those lashes, of course! The volume lash tweezers have a sharp curve at their tip, which resembles the letter L. So, these tweezers are also known as L tweezers!
With a pair of volume lash tweezers, you can easily control the volume fans you create. This makes styling unique and fabulous lash looks a breeze!
8. Round Volume Lash Tweezers
Round volume lash tweezers are similar to volume lash tweezers but have a more rounded tip compared to volume tweezers. Thanks to its short base and tight grip, you can make volume fans without losing any extensions!
How to care for eyelash tweezers
Sometimes, eyelash adhesive will get stuck on professional eyelash tweezers. To properly clean your tweezers, use a dime size amount of acetone on a cotton swab or tissue and wipe off the tips of the tweezer until clean.
Having the right professional eyelash tweezers in your kit is essential to providing the best client experience possible. You want to make sure that the tweezers you use are ideal for the lash extension technique you are using and that you maintain a firm grip.
It is a great plan to have several options for different lash looks. The Lash Professional offers a wide variety of lash tweezers that provide a comfortable grip and are extremely effective.
Make Stylish Lash Looks Comfortably!
Like we said earlier, there are so many professional eyelash tweezers out there. However, you need to buy the pair that’s right for you — after all, these stainless steel tweezers have to stick with you through thick and thin!
Basically, to buy the best lash tweezers, you want to take your time searching through your options and checking for quality supplies. Plus, you want tweezers that were made to feel right in your hands. For example, the wide range of lash tweezers provided by The Lash Professional is made with both quality and comfort in mind.
At the end of the day, ladies, if you remember that quality matters with professional eyelash tweezers, you’ll find the best items to make some fabulous lash art!
P.S. Are you more of a visual learner? Check out this YouTube video!
Knowledge is power, especially in the beauty industry.
By and large, exceptional eyelash extension curl knowledge is the basis for every awestriking lash technician.
Of course, there are age-old subjective arguments like whether classic or volume lash reign queen.
Nonetheless, there is no denying that there is an appropriate and less-than-desirable lash extension curl that should be used based on a client’s eye shape.
Not convinced yet?
Buckle up, buttercup—we’re talking about C vs. J curl and why curls matter.
C vs. J Curl Eyelash Extensions
C Curl
When lashing, the C Curl eyelash extension is going to be the most common lash you use! The C Curl executes the perfect balance between dramatic flair and natural allure.
In other words, the C Curl can help clients achieve a natural yet stunning look, all without the hassle of makeup!
The C Curl has a short base that flairs out into a natural curl shape. Even with a short base, the C Curl has enough attachment area that makes for long-lasting beautiful lash looks.
Additionally, the C Curl works great with just about any eye shape. So, if your client is looking for that natural lash with oomph, then the C Curl is the lash for them!
Quick and dirty: The C Curl eyelash extension is perfect for clients who want a lash look with equal parts drama and natural beauty.
J Curl
Have you ever had a client who wishes for beautiful, all-natural lash looks? Then the J Curl eyelash extension is the answer to their dreams!
The J Curl eyelash extension has the least amount of curl when compared to other lash curls. These lashes work best with clients who have very straight natural lashes.
Another benefit that the J Curl provides is length. Thanks to its slight curl at its tip, the J Curl eyelash extension will look longer than other lashes. That means clients can get luxurious length added to their lash looks when you use a J Curl!
Quick and dirty: For clients who love a natural look, a J Curl provides length and volume without being too intense.
Don’t Stop the Lash Journey Here!
PSA, babes: Curl matters—whether that’s C vs. J curl or otherwise. So does application technique, lash tools, creative vision, and more.
With the eyelash extension classes offered by The Lash Professional, all that juicy lash info is in one place! Plus, you get to work hands-on beside some of the most talented lash experts from The Lash Professional.
At The Lash Professional, we are dedicated to helping you achieve your lash boss dreams in style. So, what are you waiting for? Get out there and start learning how to lash like a star!
Is it Thursday again already? Where does the time go?! This week, you get a special treat, because our topic today is drying vs curing. If you keep a close eye on TLP, this is kind of a hot topic right now, because our lash boss Vanessa just put out a video on this very topic.
Can’t listen or watch right now? No worries, I got you boo. I’m gonna tell you the facts about drying and curing so you won’t ever be confused again.
What is drying?
Drying is when the outside of the lash adhesive dries quickly enough for you to continue lashing without any lashes getting stuck together. To get scientific, the chemicals in the adhesive evaporate into the air, causing the adhesive to harden. Then, you can move through lashes quickly and safely. Are you a time saver, or what?
What is curing?
Curing is when the adhesive dries all the way through to the center, by absorbing moisture from the air. This usually takes around 24 hours to complete. Curing is the reason that we don’t allow our clients to jump in a pool right after getting their lashes done. The adhesive cures at its own rate, absorbing just enough moisture. If we went and introduced ALL OF THE WATER to the adhesive, it wouldn’t cure properly. Good things take time, friends.
What does humidity have to do with it?
You’ve probably heard some different things about drying and humidity. What you’ve heard is probably half true.
If humidity is high (I’m looking at you, Floridians!), the lash adhesive will dry slowly. This is because the air is more dense and holding more moisture, so there’s not as much “room” for the chemicals to “absorb” into the air right away. However, because there is so much moisture in the air, the lash adhesive will cure more quickly than usual. Curing’s whole job is to take moisture from the air, so it’s going to have a field day in a highly humid environment.
On the other hand, if humidity is low, those chemicals are going to evaporate right into the air, and your adhesive is going to dry in a flash. The adhesive is going to cure super slowly, though, because it’s going to be gasping for moisture from that dry air.
How does this affect my adhesive?
The higher the humidity, the slower your adhesive will dry no matter what. It doesn’t matter if you’re using N1 or N5, the principle is the same. This applies to low humidity as well.
Basically, the ingredient in the adhesive that is evaporating is the bonding agent, which is why N5 dries more slowly than N1; it has less bonding agent for those lash babes who are allergic to it. So, the less bonding agent to evaporate, the more slowly it’s going to evaporate, the more slowly it dries. The opposite is true for N1.
The moral of the story is to know how adhesive works, so that you can deliver the best service to your clients, and keep an eye on the humidity in your salon, so you’re never hindered by adhesive drying and curing times.
Wholesale Lashes: 5 Things to Look for in Wholesale Lash Vendors
April 6, 2020 by The Lash Professional.
Bomb looking business cards for your new lashing business? Check! The perfect location for your shop? Double-check!
Before you can open your doors to the public, though, you still have some work to do, ladies. I’m talking about the basic needs of any self-respecting lash boss: lash extension supplies!
It may seem silly, but planning where you’re going to get your lash supplies matters. If you’ve done a little bit of research, then you’ve probably noticed the phrase “wholesale lashes” thrown around.
Wholesale lash vendors are the best no-nonsense, bulk, ‘bang for your buck’ suppliers.
First things first, though, you have to find a vendor that you can rely on. Trust us at The Lash Professional—you don’t want to learn this lesson the hard way!
To help all of you budding lash artists out there looking for the right supplies, check out these top tips we’ve put together on what to look for in a quality wholesale lash vendor.
What to Look For in Wholesale Lash Vendors: 5 Questions to Ask
1. Do they have product reviews?
We’ve all been there. You’re doing some late-night shopping to treat yourself, and as you scroll down, you see the review section. Some of the reviews are glowing, but some of them aren’t. In the end, all of those reviews can save you from making the wrong purchase.
When it comes to buying your salon’s supplies, you want to know that the products you’re buying match the product description online. One of the best ways to determine the quality of a wholesale lash vendor’s product is by checking their product’s reviews.
Do their products have reviews in the first place? If so, are they all the same (hint: this is a red flag!), or do they sound realistic?
Look for realistic and genuine reviews from customers that have purchased the product. Scan multiple reviews to make sure they aren’t copied and pasted templates from the vendor to boost their public image.
If they check out, purchase with confidence. But if something in your gut makes you hesitate, babe, take your lashes and run.
2. Is there any related social media account(s) you can check out?
Think of all those times you’ve bought an outfit, and it arrives two sizes too small. “But the image made it look different,” you may cry!
There is really only so much you can learn from a product page image. Sure, it might look nice on a blank canvas, but what does the product look like in action?
Avoid mishaps and check out the vendor’s social media.
There are plenty of vendors that sell lashes and offer styling services. Examine pictures, watch live videos, and see what their followers are saying to gain a greater understanding of their product.
Don’t get catfished ever again—search their social media!
3. Does the vendor have a blog where they share relevant or exciting information?
On the whole, an excellent way for a client to get to know a vendor is through social media or a blog.
While this blog doesn’t always need to be educational, it certainly can’t hurt.
A well-written and researched blog builds a positive reputation. It also shows that the vendor values the customer and desires to educate and build a rapport with the reader.
It’s not rocket science—it just shows that the vendor is open to taking the extra step to provide valuable information, along with products, to the customer.
4. Does the vendor know what they’re talking about?
So, by this point, you know that vendor has pretty good wholesale lashes, but here’s an important question you can’t forget: can they walk the walk and talk the talk?
Anyone can sell a newspaper or fountain pen; however, it takes an expert to know the various nuances and applications of different eyelash extensions.
Read their product descriptions, look for vendor replies to customer questions in the review section, or shoot the vendor a quick email.
If, for whatever reason, they can’t answer a question about their product, take your business elsewhere.
5. Is it easy for you to find out more about the vendor, like their contact information?
While our previous questions are about finding information on your vendor, this one is a little different. Here, you want to examine how easy—or difficult—it is to learn about your vendor outside of their store’s front page.
For example, can you find a contact page? Does it have any important information, like a phone number or email you can contact?
If a vendor doesn’t list their contact information, you may want to brush it off and give them the benefit of the doubt. However, ladies, we are telling you not to!
It’s natural for a customer to have questions, and the vendor should be readily available to receive them.
While you shouldn’t assume that every vendor who doesn’t list contact information is suspicious, it’s better to stay safe than sorry. So, your best bet is to go with a vendor you can quickly contact just in case you have any burning questions to ask.
Become the Lashing Expert You’ve Always Dreamed Of!
Ladies, these have been our tips on finding those high-quality wholesale lashes that you deserve. But, this is far from the end of the road when it comes to your lashing education.
Here at The Lash Professional, not only can you get products tested and approved by our own lash industry bosses, but those same experts can show you how to start lashing, too!
Through our comprehensive in-person classes, you can go behind the scenes at The Lash Professional and learn lashing tricks from the best.
Got a busy schedule but still dream of a future full of lashing? We’ve got your back with our online lashing classes. Now you can learn to lash legendary looks at your own pace!
So, ladies, what are you waiting for? Join your lash loving sisters and jump right into the world of lashes today!
Same with a salon. Let me tell you how to sterilize your lash extension tools and share some tips to keep your space clean and organized!
Keeping Your Lash Salon Clean
Cleanliness is oh-so important for a lash business, for ANY BUSINESS! There are a few things that play a role in reputability in the beauty industry and keeping your lash salon clean is at the top of the list! Not only will this make your business more reputable, but it will give you peace of mind knowing you are running a safe and compliant operation. Though not all states regulate lashing, remaining compliant will ensure your clients AND business is safe. Below are a few practices to ensure you are keeping your lash salon clean!
Create a chore list: I know this takes you back to your childhood but believe me when I say OUR PARENTS WEREN’T CRAZY! It works. Doing this will get you into a routine with cleaning and will even split up the cleaning duties throughout the week!
Hire a cleaning service: This can get pricey but OMG is it worth it. I do this for my space once a month and it makes a world of difference. We tend to get into a routine of what we clean and what we (accidentally) miss…like baseboards, sinks, lights, etc. Things like that collect dust and dirt and could very easily affect the cleanliness of your tools and work area! Hiring a cleaning service every now and then will ensure all those hard to reach places are taken care of.
Follow Guidelines: Whether you are following State Board Guidelines or Occupational Safety and Health Administration (OSHA) guidelines, understand what it is that needs to be sanitized and why! Not just your space, but your tools! Set guidelines are developed for the sole purpose of guiding business owners in their journey to superb sanitation!
Disinfecting and Sterilizing Your Lash Extension Tools
Cleaning means more than washing and sweeping. As professionals, we are trusted to keep things disinfected and sterilized, too! Doing so will also add to the reputability of your business! There is bacteria and infectious matter everywhere around us! You should absolutely be disinfecting and sterilizing your lash extensions tools (that means your pretty little The Lash Professional Tweezers!) after every client AND in some other situations too!
I’ve listed a few below.
After any client – whether you used them to do a full set or just a removal.
If you drop your tweezers – that is if (God forbid) the tip doesn’t bend.
At the end of every work day – better safe than sorry.
If you ever find your tweezers out and unattended – you never know who sneezed on or near the area…yuk!
When in doubt, clean it out! (That is the best I could come up with but, remember it!). You would hate to be the reason someone get’s an eye infection or an allergic reaction. When following guidelines, check out your state boards guidelines for lashing or the OSHA guidelines for sanitation! These guidelines have been meticulously developed to ensure clients remain safe! Safety, safety, safety.
Here are some simple go-to instructions for sanitizing your tools in some of the above situations:
1. After you’ve finished with your client, wash your tools with disinfectant soap and water.
2. Once you’ve washed your tools, place them in a glass container that contains Barbicide/Marvicide (it’s a Tuberculocidal hospital grade disinfectant, basically its intense).
3. After your tools soak for 10 minutes, you can remove them and wash them, again, thoroughly with soap and water.
Storing Your Lash Extension Tools
Keeping things clean does not stop after you sanitize. You’ll want to be sure you have a clean and air-tight place to keep your tools! This can cost a lot of money, or it can cost a little; I chose the little route. Target has the cutest little storage containers that stack easy and are the perfect tweezer-size! Now, if you want to spend a little more on your storage and organization, go get lost in the container store or Ikea – good luck sticking to a plan; I buy EVERYTHING when I go to these places (which is why it tends to cost a little more…then again, I do the same thing at Target so there is no winning).
Just be sure that after you spend all that time sanitizing and disinfecting your lash extension tools, you put them in a smart place to keep them ready for use!
I wish I could honestly say that sanitation is easy, well its not. There are a lot of steps and a lot of things to remember. Following this advice on cleanliness and steps on how to sterilize your lash extension tools, will however, benefit you for years and years to come. Keeping your business safe and your clients happy and healthy is the ultimate goal!
Hey lash stylist, how’s your week been? Hopefully, you’ve been slaying lashes left and right. This week, we’re talking about three different types of eyelash extensions. Say what? There’s more than one type of eyelash extension? The answer is yes. There are actually quite a few different eyelash extension options you can choose from when shopping for lashes.
We’re going to explore the differences between silk, mink, and faux mink eyelash extension types. Each has their own benefits, and it can be difficult to decide which type of eyelash extension is best for you and your clients. No worries! We’re going to help you out, babe.
Best Types of Eyelash Extensions
You may be wondering, “What are the best types of eyelash extensions?”. The Lash Professional has you covered! We’re going to share three of the best types of eyelash extensions and the benefits of each. There may be occasions when you use each one for a specific reason. Read on to learn more about these types of eyelash extensions.
Silk Lash Extensions
Silk eyelash extensions are a very popular eyelash extension option. One of the great things about them is that they’re one of the cheaper types of eyelash extensions on the market.
If your client doesn’t like the overly natural lash look, then silk lash extensions are perfect. Their extra weight provides more dramatic results than other types of eyelash extensions. They’re also thicker than some other options, so they’re more noticeable.
We love sassy silk lashes, but these should only be used on clients with super-strong natural lashes because thick extensions = heavy lashes. And we already know that too-heavy extensions can damage a client’s natural lashes. On that note, don’t forget to recommend a lash growth serum to your clients to maintain the health of their natural lashes. No breakage here!
Mink Lash Extensions
Mink eyelash extensions come from real mink fur. It is said that these creatures’ tiny hairs are collected by brushing them. If you’re going for a vegan- or cruelty-free vibe, we suggest you stay away from real mink eyelash extensions.
Don’t clutch your pearls too hard over this, but they’re the most expensive eyelash extensions on the market, meaning your clients will be paying between $300 and $500 for a full set, according to Emily McClure at Bustle. We like to offer quality services at affordable prices so we can cater to a wide clientele, and mink eyelash extensions can be a bit pricey!
Mink lash extensions are premium and provide a killer voluminous lash look, but you have to consider if they are in your price range. If price isn’t a factor for you and your clients, then mink lash extensions are a fantastic high-quality eyelash extension option.
The next type of lash extension is our personal favorite and will give you that mink lash look for less!
Faux Mink Lash Extensions
We at The Lash Professional believe faux mink eyelash extensions are the way to go.
Faux mink extensions are comparable in cost to silk extensions, but they’re made of polyester, which is a lot more versatile than silk. Also, they are feather-light compared to silk lashes.
These lashes are soft, comfortable, and come in a variety of different lengths and curl types. They give a 3D layered look that we personally love! Even better, there’s no mink involved. Read vegan- and cruelty-free, babe.
Achieve a natural lash look at an affordable price with this type of eyelash extension. If you like the look of real mink lash extensions, give faux mink lashes a try.
As you can see, there are pros and cons to each type of eyelash extension. Weigh the benefits to choose which option will work best for you and your clients.
Shop for Eyelash Extensions
So, now that you’re an expert in the different types of eyelash extensions, do you know what you’re going to invest in? If you’re looking for quality faux mink eyelash extensions at a great price (and cute as hell branding), visit The Lash Professional’s lash shop. Did you know we even have premade volume lashes in multiple lengths? I know, super cool, right? And don’t forget about our eyelash extension tools like tape, pillows, stones, and more!
If you’ve read all of our blogs, and want more, more, more, strut on over to our YouTube channel where Certified Bad B*tch Vanessa shares her wisdom on all things lashes. Here, I’ll make it easy for you. Just click play on the video below!
As always, if you have any questions, comments, or concerns, head over to our website and let us hear ’em!
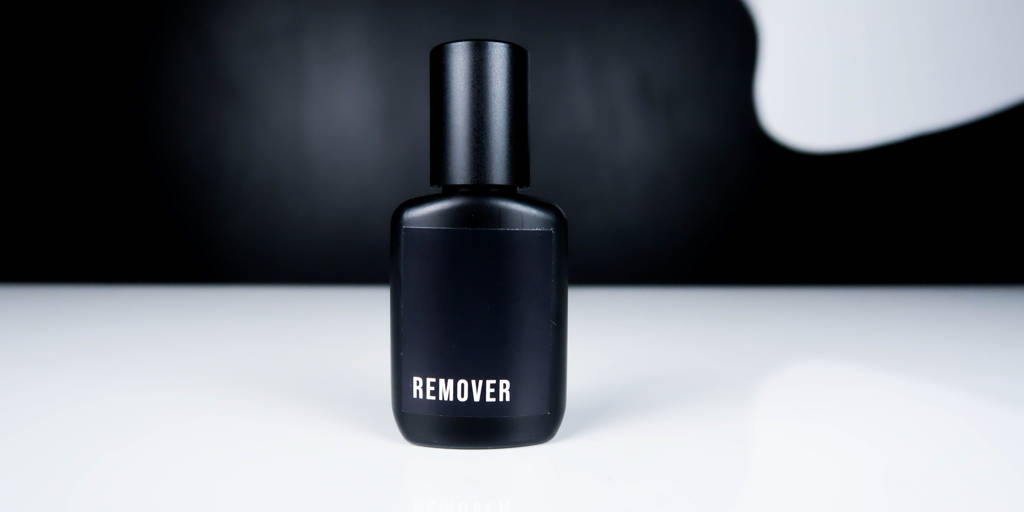
Hey lash boss! This week we’re talking about how to remove eyelash extensions. There are a variety of reasons you might need to do this, so it’s good to have it broken down so there’s no question about how to do it safely. I’m also going to recommend some bad a*s products so you can provide the best quality services to your clients.
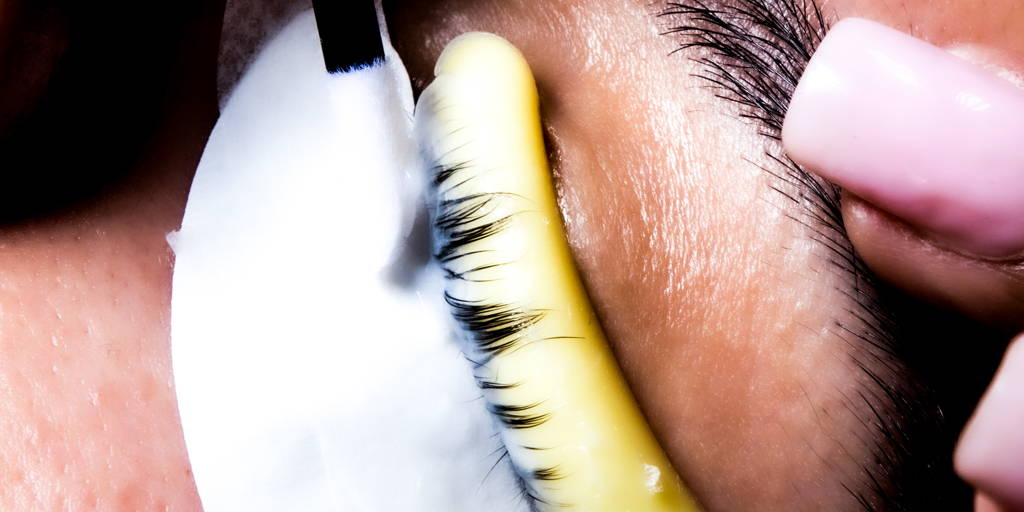
Step 1 | Apply Eye Pads
Unlike eyelash extension application, this isn’t all about protecting the bottom lashes, but your client’s skin. The skin under your eye is really sensitive and thin, and while remover is totally safe to use and isn’t harsh, it can cause discomfort to your client if the correct safety measures aren’t taken. Not only that, but the light color of the eye pads against your client’s lashes make it so much easier to see what you’re actually doing!
So, we put either Eyelash Eye Pads or Eyelash Bio-Gel Pads on the client’s under-eye area. Be sure that you are placing them comfortably, aka not too high so that your client can’t close their eye comfortably, but not low enough to miss the bottom lashes entirely.
Step 2 | Remove Eyelash Extensions
To remove the eyelash extensions, you want to put remover (we humbly recommend TLP’s Eyelash Extension Remover and Eyelash Extension Tile) onto whatever application tool you’re comfortable using and that won’t get remover into your client’s eyes. At The Lash Professional, we really like using Micro Brushes, because they’re small enough to spread the product between the lashes. We recommend using two at a time and attacking the lashes from both the top of the extensions and underneath the extensions, to really get that remover in there. Work with the remover and the extensions by coating the extensions from base to tip with remover. After a few minutes, you should see the extensions begin to easily slide off your client’s natural lash.
It’s especially important during this step to be gentle. Remember, you’re working with adhesive with strength comparable to super glue. Harsh pulling at extensions when trying to remove them could accidentally break the natural lashes, or even prematurely pull them out. This can not only damage your client’s lashes immediately, but permanently.
Step 3 | Remove the Remover
After every eyelash extension has been removed, clean the lashes with a lash-safe cleanser or even just water. Whatever you feel is going to cleanse the lashes best and won’t leave any uncomfortable residue, is fine. Wipe the lashes gently (with the eye pads still on!), to ensure that you got any pesky remover residue.
It’s important to ensure that you’ve cleaned the lashes thoroughly before you remove the eye pads and allow your client to open their eyes. Again, remover is safe to use, but stings when it gets in your eyes. That’s definitely a no-go! Getting lashes (on or off) shouldn’t be a painful process.
If you’re a audio/visual learner, we have a YouTube video all about this. Just click play below!
That’s all I have for today, babes. As always, if you have any questions about how to remove lash extensions, or even questions about our products, hit us up!
Oh hey babe! Long time, no lash. This week we’re laying out all the things you need to know to do a lash lift. There are different supplies you’ll need and steps to follow, so I’ll be linking the necessary supplies for each step!
Step 1 | Lash Lift Consultation
Lashes are like snowflakes. Each client’s lashes are unique, so have a consultation with your client before you perform the service. Some have short lashes and some have lashes for days. This is why you should always have a variety of lash lift rod sizes on hand. Not only this, but some clients might want super curly lashes, while some might just want them less pin straight. It’s important to have a consultation so you can provide your clients with the look they’re going for, and keep them happy.
Step 2 | Clean the Lashes
To have the best possible results for pretty much any lash service, we want the lashes to be squeaky clean. Use a gentle lash cleanser and a soft lash cleansing brush to clean your client’s lashes, so the different solutions are able to get to the lashes and not just the dirt and dead skin buildup. When you’re done cleaning the lashes, make sure they’re dry and apply the eye pads to protect the sensitive under-eye skin!
Step 3 | Apply Lash Lift Rod
Once you’ve chosen the correct rod size for your client’s lashes, apply lash lift glue to the back of the rod. This is what sticks the rod to your client’s eyelid and keeps it from shifting during the service. Once the adhesive is tacky, apply the rod as close to the lash line as possible, without touching the lashes. This will help make sure the lashes can curl around the rod comfortably.
Step 4 | Apply Lashes to the Rod
You’re going to use the same lash lift adhesive to glue the lashes to the rod, so you’re going to want to wait until it’s tacky again. Otherwise, you’ll just be coating the lashes in wet glue, and they won’t actually stick to the rod. Guide the lashes up onto the rod with whatever tool works best for you. We personally like to use a curved lash tweezer, because it’s not only comfortable, but it helps really flatten the lashes onto the rod, and spread the adhesive through the lashes.
Additionally, work in sections. This will help you ensure that every lash is sticking to the rod, and that they’re staying there! Apply more adhesive as necessary.
Step 5 | Apply Lash Lift Lotion
Again, use whatever works best for you, but we highly recommend using micro brushes to apply the lash lift lotion. Micro brushes work great, because you only want to apply lotion to the midsection of the lashes, and micro brushes are small enough to allow you to be very precise with application. You can apply plastic wrap after the lotion, if you want, to keep the lotion free from air, and to help keep the lashes on the rod. Check the processing time for whatever product you’re using, and take into account the conditions of your client’s lashes.
Step 6 | Remove Lash Lift Lotion
After the processing time is up, you can remove the lash lift lotion.
Step 7 | Apply Lash Set Lotion
Apply the set lotion the same way you applied the lift lotion. You may use plastic wrap again, if you’d like.
Step 8 | Remove Lash Set Lotion
Repeat Step 6. Isn’t this easy?
Step 9 | Apply Lash Nourish Lotion
Unlike the lift and set lotions, you can actually get nourish lotion all over the lashes. This is a good time to begin to remove the lashes from the rod, by gently getting under the lashes with a micro brush. Also, gently remove the lash lift rod, keeping in mind that you glued it on! Nothing we do should cause discomfort to your client.
Step 10 | Clean the Eyelids
Make sure your client is totally ready when the service is over. This means making sure they look flawless. No glue residue should be found after the service, and if you tinted the lashes, make sure their skin didn’t get stained somehow…but you used eye pads, right? Clean the excess nourish lotion off of the lashes, too.
If you read all of that, and you’re craving some visualization? Check out the video below! Then shop our lash lift supplies so you can lift up lashes for happy clients.
 Skip to content