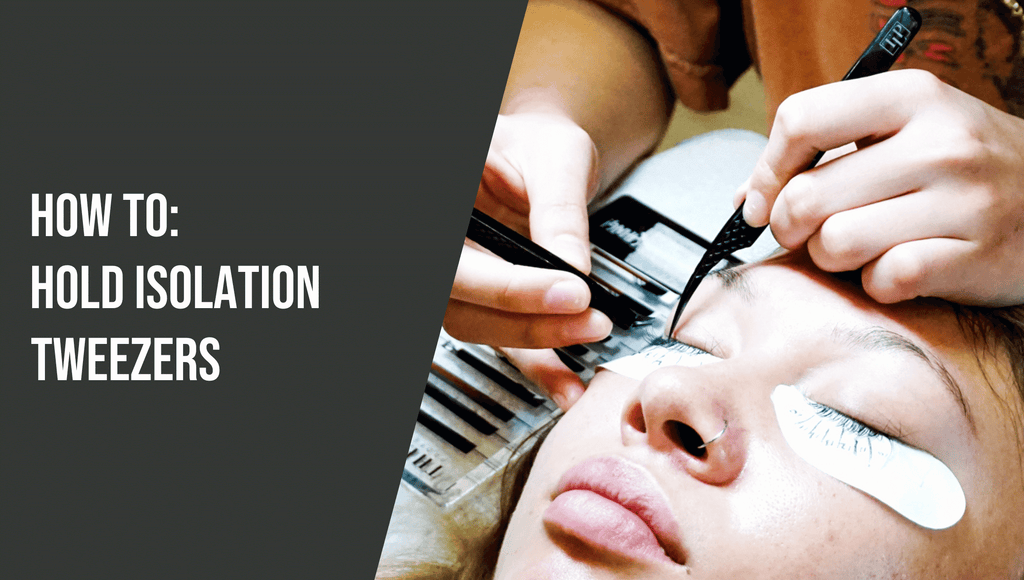
How to: Hold Isolation Tweezers
December 12, 2023 by The Lash Professional.

As a lash artist, mastering your tools is the foundation of flawless extensions. Among the most essential skills is learning How to: Hold Isolation Tweezers. These tweezers play a crucial role in isolating each natural lash, ensuring proper placement of extensions without sticking to neighboring lashes. Proper technique not only improves the quality of your work but also enhances your speed and comfort during appointments.
In this guide, I’ll share the secrets to holding isolation tweezers like a pro, common mistakes to avoid, and why The Lash Professional’s tweezers are the perfect addition to your toolkit.
Why Isolation Tweezers Are Essential for Lash Artists
Isolation tweezers are specifically designed to separate a single natural lash from the rest, creating a clear workspace for applying extensions. Without proper isolation, lashes can stick together, causing discomfort, retention issues, and a less polished final look.
Using the right technique when holding these tweezers is crucial for achieving:
Precision: Isolating a single lash ensures accurate placement of extensions.
Speed: Proper technique minimizes fumbling, allowing you to work more efficiently.
Comfort: A correct grip reduces hand fatigue, making long appointments easier to handle.
Step-by-Step: How to Hold Isolation Tweezers
If you’re wondering How to: Hold Isolation Tweezers correctly, follow these steps to perfect your technique:
Step 1: Choose the Right Tweezers
Start with high-quality isolation tweezers, like those from The Lash Professional. Look for tweezers with a comfortable grip, lightweight design, and perfectly aligned tips to make the process seamless.
Step 2: Find Your Grip
The way you hold your isolation tweezers is critical for precision and comfort. There are two common grips to try:
Pencil Grip: Hold the tweezers as if you’re holding a pencil, with your thumb and index finger applying gentle pressure.
Overhand Grip: Hold the tweezers overhand, with your thumb resting on one side and your index finger on the other.
Experiment with both grips to find which feels most natural for you.
Step 3: Position Your Fingers
Ensure your fingers are placed on the flat or indented areas of the tweezers for maximum control. Your grip should be firm but not too tight to avoid unnecessary strain.
Step 4: Angle the Tweezers Correctly
Hold the tweezers at a slight angle, allowing the tips to align perfectly with the lash line. This angle gives you a clear view of the natural lashes and makes it easier to isolate.
Step 5: Practice Gentle Pressure
Use light, controlled pressure to open and close the tweezers. Over-squeezing can lead to hand fatigue and difficulty maintaining precision.
Step 6: Maintain Stability
Rest your hand on a stable surface, such as your client’s forehead or a lash pillow, to keep your movements steady.
Tips for Perfecting Your Technique
Even seasoned lash artists can benefit from refining their skills. Here are some pro tips to help you master How to: Hold Isolation Tweezers:
Practice Makes Perfect
Isolation takes time to master. Practice on a lash mannequin or strip lashes to build confidence and muscle memory.
Keep Your Wrist Relaxed
Avoid stiff, awkward movements by keeping your wrist relaxed. This reduces strain and allows for smoother motions.
Focus on Precision Over Speed
It’s better to isolate accurately and take your time than to rush and risk stickies. Speed will come naturally with practice.
Use Quality Tools
Cheap tweezers can misalign over time, making isolation difficult. Invest in high-quality tools like The Lash Professional’s isolation tweezers for long-lasting precision.
Maintain Proper Lighting
Good lighting is essential for clear visibility of the lash line. A ring light or magnifying lamp can make isolation much easier.
Common Mistakes to Avoid
While learning How to: Hold Isolation Tweezers, it’s important to avoid these common pitfalls:
Using Too Much Pressure: Over-squeezing can damage the natural lashes and cause hand fatigue.
Improper Alignment: If the tweezers aren’t aligned with the lash line, you’ll struggle to isolate effectively.
Rushing the Process: Isolation is a meticulous task that requires patience. Slow down and focus on precision.
Neglecting Tool Maintenance: Dirty or misaligned tweezers can hinder your performance. Clean and inspect your tools regularly.
Why Choose The Lash Professional’s Isolation Tweezers?
When it comes to isolation tweezers, quality matters. The Lash Professional offers a range of tweezers specifically designed for lash artists, making isolation easier and more efficient.
What Sets The Lash Professional Tweezers Apart?
Premium Stainless Steel: Durable, rust-resistant, and lightweight for extended use.
Perfectly Aligned Tips: Ensures precise isolation every time.
Ergonomic Design: Reduces hand fatigue and allows for comfortable, natural movements.
Variety of Styles: From straight to curved isolation tweezers, there’s a perfect fit for every artist.
Final Thoughts on How to: Hold Isolation Tweezers
Mastering How to: Hold Isolation Tweezers is a fundamental skill for any lash artist. With the right tools, proper technique, and a little practice, you’ll be isolating like a pro in no time. Remember, precision and comfort go hand in hand, so take the time to find what works best for you.
If you’re ready to upgrade your tools, check out The Lash Professional’s Isolation Tweezers. Their high-quality design will not only make your job easier but also elevate the quality of your lash sets. Happy lashing!


