The #1 Wispy Eyelash Extension Style Chart
November 30, 2022 by The Lash Professional.

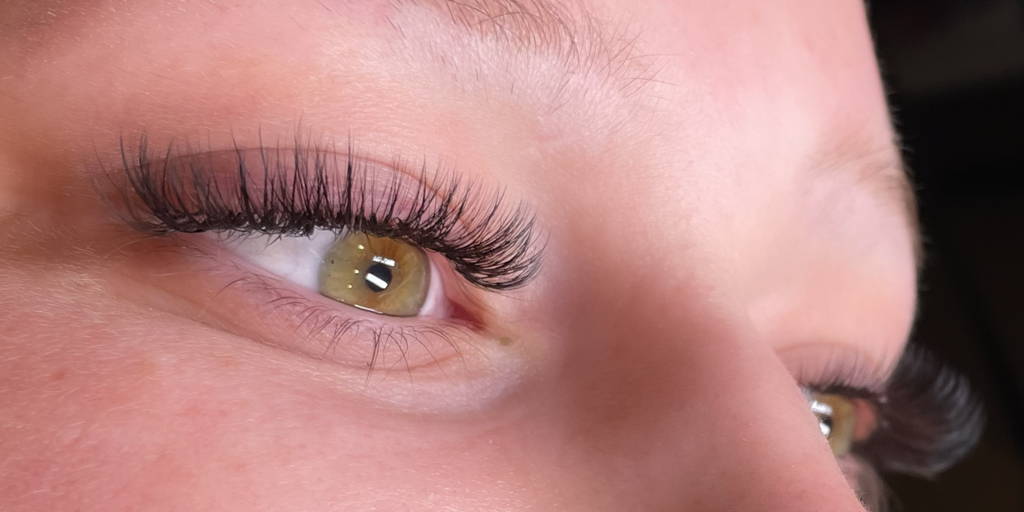
Years back, people could only get classic eyelash extensions, which are one individual lash extension per natural lash. But people wanted more choices and styles as aesthetic trends evolved, so new styles were developed. The most popular style now is wispy lashes, which are denser, fluffier, and have more volume than other types of eyelashes.
If you're an eyelash extension specialist looking to perfect your wispy style, or a client trying to find the best style for your next appointment, this wispy eyelash look might be for you.
What Does Having Wispy Eyelashes Mean?
Wispy lashes are achieved by having lash extensions that are thinner at the base and gradually get thicker toward the ends. This style is also called “feather” lashes. The wispy lash style gives your eyes a natural but enhanced look. The preferred effect is to make your eyes look wider and more open, which is perfect for an everyday look. Wispy eyelashes can also look gorgeous and glamorous for special occasions.
How Do I Achieve the Wispy Look?
There are several ways to achieve wispy lashes. The main goal is to create a fluffy, voluminous effect.
You can either:
- Use wispy lashes that are already pre-made. These come in various lengths, thicknesses, and curvatures
- Make your own wispy lashes by creating fluffy volume fans.
Wispy Lash Styles
There are various wispy lash styles that you can achieve, depending on the length, thickness, and curvature of the lashes. The three primary styles are classic, volume, and hybrid.
Classic wispy lashes are perfect for those who want a more natural look. The classic wispy style uses thinner, shorter lashes that are applied one by one to your existing lashes. This method is great for people with sparse lashes or those who want a softer look.
Volume wispy lashes use multiple, thinner lashes to create a fuller, more fluffy look. This style is perfect for special occasions or for anyone who wants to add more volume and drama to their lashes. It is done by applying 2-6 thin lashes to each natural lash.
Hybrid wispy lashes are a mix of classic and volume wispy styles. This method uses both classic and volume lashes to create a unique, intermediate look. You can achieve this look by mixing classic and volume lashes or by applying classic lashes to the inner corner of your eye and volume wispy lashes to the outer corner.
How Does Lash Mapping Help With Wispy Lashes?
Lash mapping is the process of plotting out where each individual lash extension will be placed. This is done by using a fine-tipped pen to mark the placement of each lash on an eye pad. The lash stylist then uses the lash map as a guide to apply the extensions.
Lash mapping is particularly important for wispy lashes because of the wispy lash style's graduated look. You want to make sure that the extensions are applied in a way that creates a natural, fluffy look. Lash mapping helps to achieve this by allowing the lash stylist to be precise with their placement.
And there you have it! Now you know all about wispy lashes and how to achieve the wispy look.
Check out the online lash extension certification courses at The Lash Professional. Our courses are designed to give you the skills and knowledge you need to become a successful lash technician. Enroll today and start your Lash Pro journey!


