Tips and Tricks
How to Run a Flawless Eyelash Extension Consultation
How to: Run a Flawless Eyelash Extension Consultation
October 19, 2022 by The Lash Professional.
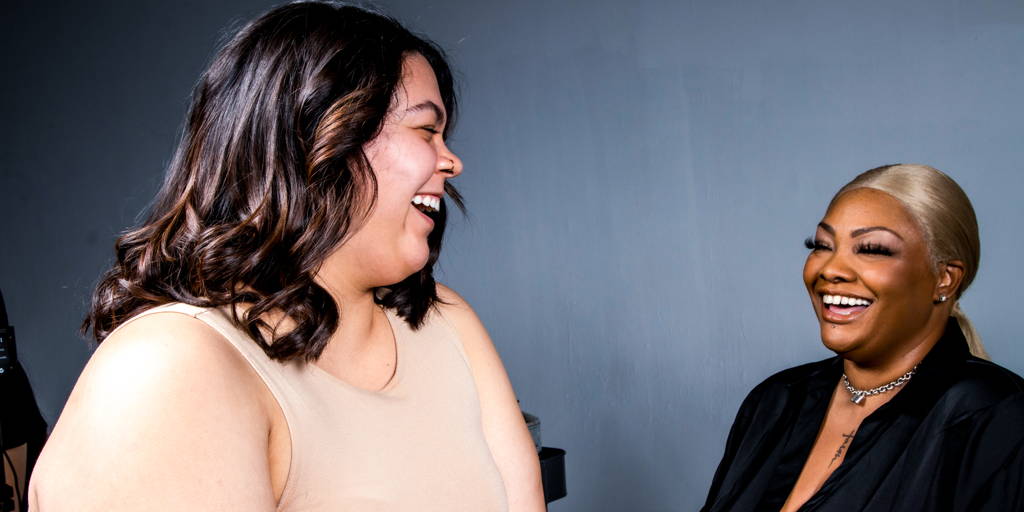
Lash Pro Tips: What To Say To a Client With a Picture Request for Eyelash Extensions
Because of the growing popularity of eyelash extensions, it's likely that most of your new clients coming in for the service will have an idea of the look they want beforehand. Whether they have friends or coworkers who get eyelash extensions, or they have seen pictures on the internet (likely on Instagram), there is a high chance that they have a pretty good idea of “the look” they are going for with their lashes.
It is quite common for clients to bring pictures of eyelash extensions to their eyelash extension appointment. This gives the lash artist examples of what they like or dislike on others. Pictures can be very helpful and are a great way for you to get an idea of the general look that the client desires.
However, a client can bring in a picture of eyelash extensions that may not be the best option for them when taking their natural lashes, eye shape, and daily makeup routine into account. While it’s important to listen to the client's wants and needs, it’s also your job as a lash specialist to advise them of their best options, given their natural lashes, their unique lash pattern, and eye shape. This can be achieved by knowing how to do an eyelash extension consultation.
Because every client has a unique natural lash pattern and eye shape, it is important to treat each client as an individual when it comes to choosing the eyelash extensions you will apply. A lash artist could use the exact same lengths, curl, and diameter on two different clients, and both sets will turn out completely different. This is what makes lashing an art form!
How To Do An Eyelash Extension Consultation
How do you decide which eyelash extensions to use? By observing, and by asking questions!
One of the most important parts of the lash appointment is the eyelash extension consultation. This is not only for you to get an idea of what the client hopes to achieve with the service but also gives you an opportunity as the stylist to set reasonable expectations prior to applying the lashes.
Here are a few things to take into consideration:
1. Observe the client’s natural lashes
Do they have few or many lashes? Are their lashes short or long; thick or thin? How do their lashes grow? (Straight, down, overlapping?)
2. Take into account the client’s eye shape
Are their eyes round or almond? Do they want a look that will open up their eyes more, or that draws out in the corners?
Note: If they have downturned eyes a “cat eye” look can make their eyes appear droopy.
3. Ask questions!
- What are they getting the lashes for? For a special occasion or everyday convenience?
- What kind of look are they going for? Natural or dramatic? (*Keep in mind, “natural” means something different to everyone.)
- What is their makeup routine? Simple or complex? This will help you decide if they need lash extensions that are easy to take care of or if they are okay with a higher-maintenance style.
- Do they have any lash concerns? (Sensitivity, loss, etc.)
- Do they have any allergies or medical conditions that could affect the service?
- Do they have any time constraints? (might not be able to come in for fills as often)
Important Consent Forms To Prepare Prior To The Procedure
Consent forms are not mandatory, but they are highly recommended to avoid future complications. After all, you want to be protected in case anything goes awry!
Here are a few eyelash extension consent forms that we recommend you have your clients fill out before the eyelash extension service:
Allergy/Irritation Test Consent Form
If the client has never had eyelash extensions, you can perform a patch test 24-48 hours before the appointment. This is to ensure that the client does not have an allergic reaction to the lash adhesive.
Lash Extension Consent Form
This form should go over details of the service. It is important that the client understands that there is a risk of damage to their natural lashes if the eyelash extensions are not applied or removed properly.
Medical History Consent Form
This form should cover any medical conditions or allergies that the client has that could affect the eyelash extension service.
When To Say "No" To a Client and How To Do It
There are certain cases where it is not recommended to apply eyelash extensions or where you, as the lash stylist, should use extra caution.
Here are a few examples that should be considered during the eyelash extension consultation:
- If the client has active blepharitis, this is an inflammation of the eyelid that can cause redness, itching, and burning. If left untreated, it can lead to eyelash loss.
- If the client has had a recent lash lift or tint, they will need to wait 2-4 weeks before getting eyelash extensions.
- If the client has any current eye infections, this includes pink eye, styes, or conjunctivitis.
- If the client has had recent eyelid surgery, they will need to wait at least 6 weeks before getting eyelash extensions.
- If the client has very sensitive skin or eyes, they may not be a good candidate for eyelash extensions.
If you are unsure about a client’s case, it is always best to err on the side of caution.
Saying “no” to a client can be difficult, but it is important to do what is best for both the client and your business. Be sure to explain your concerns and why you are not able to provide the service. Thank them for their understanding, and let them know that you would be happy to provide a different service, postpone the session, or wait for them to visit a medical professional (if needed).
Between asking the right questions and observing the client’s natural lashes, you should be able to come up with a game plan, and then be able to explain which lashes will work best for the client and why. Often, your clients will come to the eyelash extension consultation with an idea of what they want, but they will also be looking for a bit of guidance.
Remember: you are the lash expert, so gather the information you need, and then be confident in your decisions!
A thorough eyelash extension consultation is essential to providing a great eyelash extension service. As long as you ask the right questions, are clear with the client about what you are going to do, and are confident in your ability to do your best work, we can almost guarantee that your client will leave happy and feeling uniquely beautiful with their new lashes!
Three New Eyelash Extension Techniques for Lash Artists in 2022
Lash Shedding Season: What it is & How to Prep Your Clients
Lash Shedding Season: What it is & How to Prep Your Clients
February 18, 2021 by The Lash Professional.

You've probably noticed that just as your other types of hair fall out, you're always losing lashes, too. Whether it's just a few or it's several lashes on any given day depends on many different factors (including how often you rub your eyes!), but on average, people lose between three and five lashes each day.
You may think that sounds bad, but did you know there are times of the year when you can actually kiss even more lashes goodbye, and that there's nothing you can do about it? Yep, every spring and fall, you lose more lashes than normal during the lash shedding seasons.
What is a Lash Shedding Season?
What exactly is a lash shedding season? During a seasonal lash shed, there's a noticeable uptick in the number of lashes that fall out. But why does it happen? Well, we're animals, right? And just as other animals shed unnecessary fur as the weather begins to warm up, humans shed lashes with the arrival of spring. This completely natural cycle then repeats itself later in the year, as summer makes way for cooler fall weather, and your eyes are ready once again for new lashes.
How Long Does Lash Shedding Season Last?
How long does lash shedding season last? A lash shed takes up a not-insignificant time of the year, around six weeks (or about one to two lash cycles). If you add both shedding seasons (spring and autumn) together, that actually means lash shedding occupies around 12 weeks of the year –– that's almost three months! This is a good chunk of the year in which you're losing more eyelashes than you do during other seasons.
How Lash Shedding Season Affects Your Clients
Since eyelash extensions are applied to natural lashes, your clients are bound to notice they're shedding even more eyelash extensions than they normally would any other time of year. People who are unaware of the reasons for this might freak out or even get angry and blame you when this happens. You may find that clients who recently had appointments return to your salon or studio soon afterward during a shed, complaining that their extensions are falling out. What should you do?
You can put your clients' minds at ease by explaining what lash shedding season is, and by emphasizing that excess shedding is completely natural at certain times of the year. Tell them that whenever seasonal lash sheds roll around, this means it's also lash extension shedding season –– there's no avoiding it!
What They Need To Know About Lash Shedding
What do you and your clients need to be aware of if they're getting eyelash extensions during lash shedding season?
Well, firstly, they may find that their eyelash extension appointments take longer to achieve their desired look since fewer natural eyelashes means more work for you. In such circumstances, it's easy to see how it could be more difficult to help volume up someone's lashes, right? Secondly, once your clients have had eyelash extensions applied, they're going to have to do more to maintain their look during a shed.
You can advise your clients that one of the best ways of mitigating the effects of lash shedding season, and keeping their lashes looking full and beautiful all year round, is by scheduling more frequent fill appointments.
Normally, you might tell your clients to space out filling appointments to every two to three weeks, to account for natural shedding (we probably lose about 21 natural lashes a week most of the time, anyway). Seasonal lash extension shedding will take a greater toll on their look.
lash shedding season dates
Are your lashes ready for the changing seasons? As we approach the lash shedding season, it's essential to understand when it occurs and how to care for your lashes during this period. Lash shedding season dates vary, but typically it coincides with the natural growth cycle of your lashes.
Wondering when is lash shedding season? Keep an eye out for signs such as increased lash fall and thinner-looking lashes. The shedding season for eyelashes is a normal phase in the growth cycle, where older lashes make way for new ones. To ensure your lashes remain voluminous and healthy, consider investing in high-quality lash care products.
During the shedding season for lashes, it's crucial to prioritize specification and quality in your lash care routine. Opt for nourishing serums that promote lash health and prevent breakage. Look for ingredients like biotin and keratin to strengthen your lashes from root to tip.
Don't let lash-shedding season catch you off guard. Instead, take proactive steps to maintain lash quality and fullness.
Elevate your lash care routine and say goodbye to worries about thinning lashes. Invest in quality, and let your lashes shine all year round.
More Frequent Fills Can Help
It may sound self-serving to your clients, but you would do well to explain to them that they really will likely need more frequent fills to deal with lash extension shedding. This means coming in every other week. If they're truly committed to maintaining what you've achieved for them with eyelash extensions, your clients won't mind visiting you for fills every two weeks instead of every three.
As for those who need a bit more convincing, simply explain to them that it would be a real shame for all that time and money they've spent on eyelash extensions to go to waste!
Encourage Good Lash Extension Maintenance Habits
To avoid having to convince clients of the necessity for more frequent lash fills just during certain times of the year, you may want to help them another way. You can, from the get-go, instead get your clients into the routine of scheduling lash fills every two weeks.
The general reasoning for this fill frequency can be how it can take a lot of commitment to maintain a look with eyelash extensions. You can also mention how it's incredibly helpful for dealing with increased lash extension shedding during shedding season. Problem solved!
Handle Lash Shedding Season With The Lash Professional
The Lash Professional has everything lash artists need to stay fully stocked for lash shedding season. And, if you want to improve your craft, perhaps to better handle lash extension applications or fills during sheds, The Lash Professional has online and live lash extension courses you can attend on your own schedule.
How to Recycle Your Eyelash Mascara Wands for Wildlife
How to: Recycle Your Eyelash Mascara Wands for Wildlife
June 27, 2017 by The Lash Professional. Posted in Get Money.
Dramatic Eyelash Extensions: Guide To The Best Curls
Dramatic Eyelash Extensions: Guide To The Best Curls
April 22, 2020 by The Lash Professional.
Any lash artist knows she doesn't need drama—unless it's in her lashes, of course!
Whether you want a look that pumps up the volume or adds a subtle edge to your beauty, you'll need some eye-catching eyelash extensions.
So, any eyelash extensions will do, right? Wrong! Picking the incorrect eyelash extensions is like picking a dress that doesn't fit: it just isn't cute.
How can you know what dramatic eyelash extensions are the right ones for you, then?
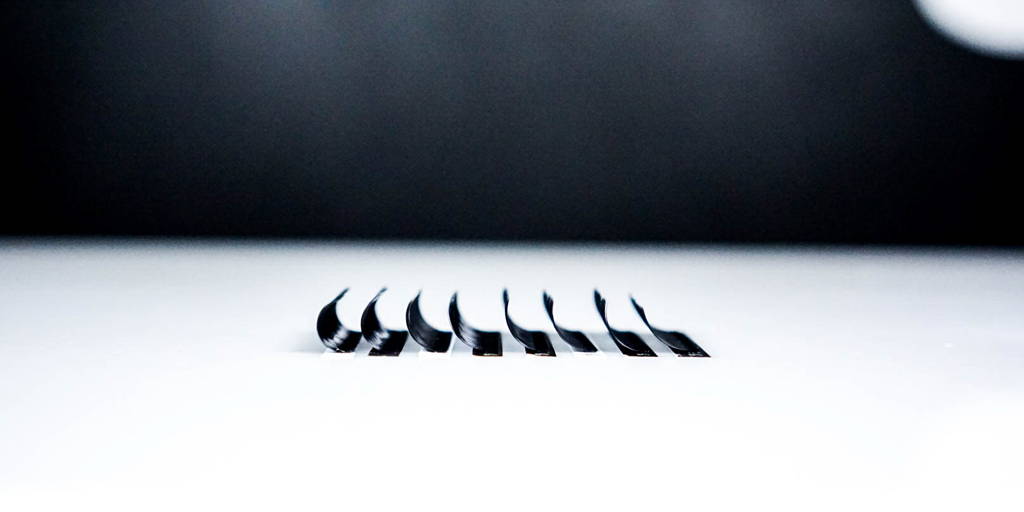
One of the most important things to keep in mind when looking for lash extensions is lash curl.
To put it simply, each lash curl gives you a different lash look. What curl you use depends on the shape of your eye, your natural lash length, and more.
Alright, those lash looks won't create themselves.
To get you started, we're going to take you through the process of picking the right curl as well as why each curl works best with certain eye shapes and more!
Dramatic Eyelash Extensions: Learn What Curl to Use For Unique Eye Shapes
Eye Shapes, Natural Lashes, and Eye Extensions
One of the first steps you're going to take when styling a lash look for a client is to look at their eyes. This may seem like a given, but it matters!
What am I looking for, specifically, when looking at someone's eyes?
There's a lot you can learn from your client's eyes: the natural curl (or lack of a curl) to their normal lashes, their eye shape, and even how healthy their lashes are.
Generally, you want to take all of this into account when picking the right curl. First, though, we're going to look at eye shapes.
While there are many different unique eyes out there, there are three main eye shapes you're likely going to see: round eyes and almond eyes.
As for types of natural eyelashes, a client may have straight lashes, lashes pointing downward, slightly curly lashes, or a variation of lash types!
Once you have a general idea of what you're working with, you're ready to start choosing curls. Typically, you want to compliment your client's natural lashes and eye shape while still giving them beautiful eyelash extensions!
Curl Sizes and What Looks They Best Compliment
Before we get to matching lash curls to create killer looks, let's cover an important point first: lash extensions aren't one-size-fits all!
In other words, base each client's look on their unique eye shape and natural lashes. You won't be able to slap on your favorite volume D curl lash combo or J curl set onto every client. So, every look you make is going to be different, even if only slightly.
Thankfully, there are plenty of eyelash extension curl sizes for you to use out there. Below, we go over some of the basic curls you may use when lashing looks for clients.
C and CC Curl Extensions
We're starting with the C curl because it's more likely than not that this will be your go-to lash.
If your client wants some added flavor to her already slightly curled lashes, try out C curl lashes! Thanks to the natural curl of the C curl, these lashes are just right for making natural lashes pop with an open-eye effect.
On the other hand, you've also got CC curls. You'd use a CC curl when a client wants even more drama in their lashes without looking unnatural. This added drama is thanks to the CC curl having a curlier tip compared to the C curl.
J Curl Extensions
Let's say a client comes in and has the straightest eyelashes you've ever seen. Don't start panicking! While these may not be the lashes you see every day, you can get a client with straight, almost downward pointed eyelashes.
For these lashes, the best curl to use would be a J curl. The reason why a J curl works with straight lashes is due to it's simple but impactful curl at the tip.
B Curl Extensions
Another option for straight eyelashes would be a B curl! Typically, the B curl works best with straight eyelashes that don't point down.
There are some major differences between B vs. J curl extensions, but the main one to remember is the lift that a B curl has the appearance of a naturally curled lash. It is similar to the curl that you’d expect after curling your lashes with an eyelash curler.
Add a Healthy Dose of Lash Drama
Like we said before these curls are just the tip of the iceberg.
After all, there are other ways to add some flair to a client's lashes. Make any client's eye color pop with some rainbow-colored eyelash extensions! Or, you could experiment with silk, mink, and faux mink lash extensions when making an innovative look!
All in all, a lot is waiting for you to try out in the world of lashing. But what's the best way for you to get started? By enrolling in a comprehensive course provided by The Lash Professional, of course!
To all of you future lashing icons out there, the courses at The Lash Professional are a surefire way to learn everything you want and more about the lashing world.
Plus, we've got online and in-person lashing courses. If you want to unleash the lash beast, but at your own pace, try out The Lash Professional's online courses. Learning to lash from your comfy living room couch is pretty amazing!
For you lash babes who want an upfront piece of the action, you can enroll in our in-person courses. There, you'll be taught how to lash to your heart's content by The Lash Professional's very own lash experts.
Jump headfirst into the world of dramatic lash looks by enrolling in The Lash Professional's classes today!
Tips on Eyelash Extension Bonding & Retention
Tips on Eyelash Extension Bonding & Retention
June 12, 2017 by The Lash Professional.
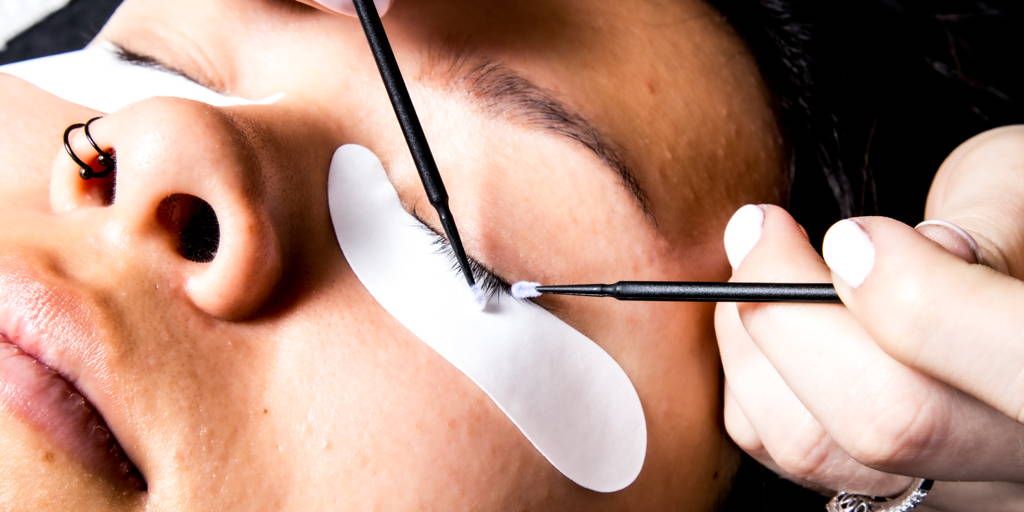
Eyelash Adhesive
Temperature for Eyelash Glue:
We do not recommend storing your adhesive in the refrigerator. This will cause any moisture inside the container to condense, which in turn prematurely cures the adhesive!
Humidity for Eyelash Glue:
To monitor your lash room's humidity level, we suggested that you purchase a hygrometer which measures the humidity/moisture in your lashing room.
- If the humidity is too high, we suggest purchasing a de-humidifier. This will lower the humidity in the room by removing the moisture in the air.
- If the humidity is too low, then you may need a humidifier. This works by releasing water vapor into the air to increase humidity. This is ideal when are lashing in a dryer environment.
Lastly, remember to shake your glue vigorously before opening. 30 seconds for a new bottle, and 10 for a recently used bottle. Discard the first drop and applying the second to your stone.
Remember to use a new glue drop as soon as it starts to get stringing or tacky, otherwise it will be less effective. Typically every 20-40min depending on your lashing environment.
7 Health Tips for Lash Artists
7 Health Tips for Lash Artists
August 29, 2017 by The Lash Professional.

Taking care of yourself is the ultimate lash health! Here at The Lash Professional, we truly believe that in order for you care for others, you must first and foremost, care for yourself. In order for you to feel great and do your best work, you must treat yourself and your body with kindness and care, in order to stay mentally and physically healthy.
seven suggestions to better care for your body in and out of the lash salon.
Posture
Having good posture while lashing is extremely important! Leaning too far forward or being hunched over the lash bed can cause aches and pains in your neck and back, and can even lead to possible long term back issues over time. In order to avoid this, we suggest positioning the client’s head as close to you as possible, so you don’t have to lean too far over them. Position the lashing bed and your adjustable stool both at a height where you are able to sit straight upright, with both feet still touching the floor. (Place your feet on on either side of the bed, so you are straddling the bed while performing the service.*If your lashing bed allows you to place your legs under the table, this can be another comfortable option.) In this position, you should be able to rest your arms comfortably at a 90 degree angle on the pillow, or while resting your hands on the clients forehead.
Stretch
As a lash artist, much of your day is spent sitting and sedentary. Because of this, it is very important to take breaks between clients to get up, stretch and walk around. This movement is important for your muscles, joints, and blood circulation. Make sure to give yourself breaks during your day to walk around the block, or in the very least, stand up, walk around and stretch.
Drink water
Staying hydrated throughout the day will keep your energy level up, and will keep your mind and body functioning at its best ability.
Eat healthy
Choose energy rich and fueling foods. Not only will you feel better and more energized throughout the day, but you won’t get that afternoon sugar/caffeine crash) Rest up – Get enough sleep! The amount of sleep that each person needs at night in order to function properly the next day can vary greatly depending on the individual. It’s important to learn what your body needs in order to feel rested, stay alert, and perform at your best ability. If you start your day feeling tired groggy, then siting still behind a lash bed is only going to make it much harder to concentrate.
Dress comfortably
This doesn’t necessarily mean that you can’t also dress cute. However, we recommend choosing outfits in which you can sit comfortably all day, that aren’t too tight, or cause you to move around and/or need to adjust constantly.
Eye care
Squinting or straining your eyes while performing the service can cause headaches and blurred vision. If you find this to be happening, we recommend using magnified (or reading) glasses, or even add additional/brighter lights to your work station.
Exercise
Exercising in your off time is crucial to the overall health and care of your body. Whether it’s yoga, running, or even something more mild – such as walking or stretching, keeping active and a maintaining a strong “core” will make all the difference when it comes to your ability to sit and lash for long periods of time.
When you are rested, strong and healthy, you will feel better, have more energy, and in turn, be able to take better care of your clients.
“You can not pour from an empty cup – take care of yourself first.”
Lash Artist Tips for Fidgety Clients
Lash Artist Tips for Fidgety Clients
September 17, 2017 by The Lash Professional.
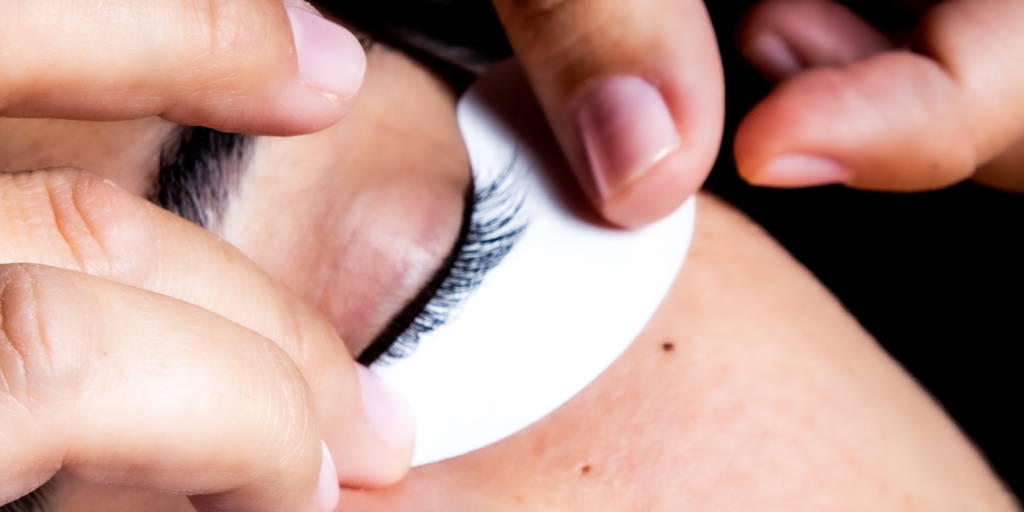
As a fellow lash artist, we understand how difficult it can be to do your best work if you are working on a client who is unable to hold still and/or has fluttery eyes.
Applying lash extensions requires a steady hand and lots of patience. Ideally, clients will lay still and sometimes even fall asleep while you are performing your magic. However, this is not always the case.
Every now and then, you will have a client who moves around, twitches, or has fluttery eyes. Although this can be a bit frustrating and may even slow you down a bit, it is a common obstacle that all lash artists must learn how to work around.
Here at The Lash Professional, we have gathered a few tips from our lash artist team on how to deal with these fidgety clients, as well as helping the client relax, so you can lash more quickly and efficiently.
1) Be Patient Lash Artist.
We don’t always know what’s going on in someone’s life that may be affecting their ability to calm down and/or hold still. If they come in flustered or uptight, try and help them calm down a bit before having them lay on the table. Offer them some water or to use the restroom, and relay to them to take their time if needed.
2) Create a calming ambiance Lash Artist.
If your lashing environment is calming and peaceful, your clients are likely to pick up and internalize that energy as they walk in. Even if they first enter flustered or hyper, playing soothing music, and having inviting aromas in the air, will help them relax and unwind a bit once laying on your lashing table.
3) Adjust your lash light away from client’s eyes Lash Artist.
If your client has very light-sensitive eyes, or you find that they are squinting or scrunching their eyes shut as you are trying to apply the pads, tape or lashes, it may be bright lashing light they are struggling to adjust to. If this is happening, try moving your lashing light up and away from their eyes a bit. It is still possible to keep the light on, but facing it so it’s not directly above their face, can will help if they are sensitive to it.
4) Talk a bit less.
This one can be tricky and may even sound a little weird, but hear us out. Here at The Lash Professional, we strongly encourage getting to know your client and engaging them in conversation (if that is what they want). However, when people talk (especially when they use their hands as they talk) they are more likely to fidget and move their body or face around as well. If you find this to be the case, we recommend cutting back on the conversation just a bit, and see if this helps them settle down.
*If you client is very talkative, you of course don’t want to be rude and ignore them. You can kindly mention that although you enjoy the conversation, that any extra movement makes it difficult for you to fill their lashes. Most clients will likely rather be told (kindly) to hold still a bit, if it means that their lashes will be fuller when they leave.
5) Check in and ask questions Lash Artist.
If your client is fidgeting or moving a round a lot, or their eyes are squinting or fluttering, check with them to make sure that they are comfortable. Is the light too bright? Are the eye pads stinging or pinching at all? Do they need a blanket or extra pillow under their knees? Your client may not want to sound needy, and therefore might not voice discomforts until asked.
*This also gives you an opportunity to point out that their actions are affecting your ability to apply their extensions, without feeling rude. If this is a reoccurring issue during their appointments, you can ask questions may suggest (kindly) that they hold off on caffeine before coming in to their lash appointment.
A client who moves around a lot can make it very difficult for you to perform a lash service, as well as nerve-wrecking when working with sharp tools near their eyes. We have found that if you make these slight adjustments, and are kind yet informative as to why their fidgeting can be difficult for you, they are likely to focus on calming down and moving around less. After all, clients come to you because they want their lashes to be full and beautiful!
Extreme Volume Lashes: How To
Extreme Volume Lashes: How to
November 13, 2017 by The Lash Professional.
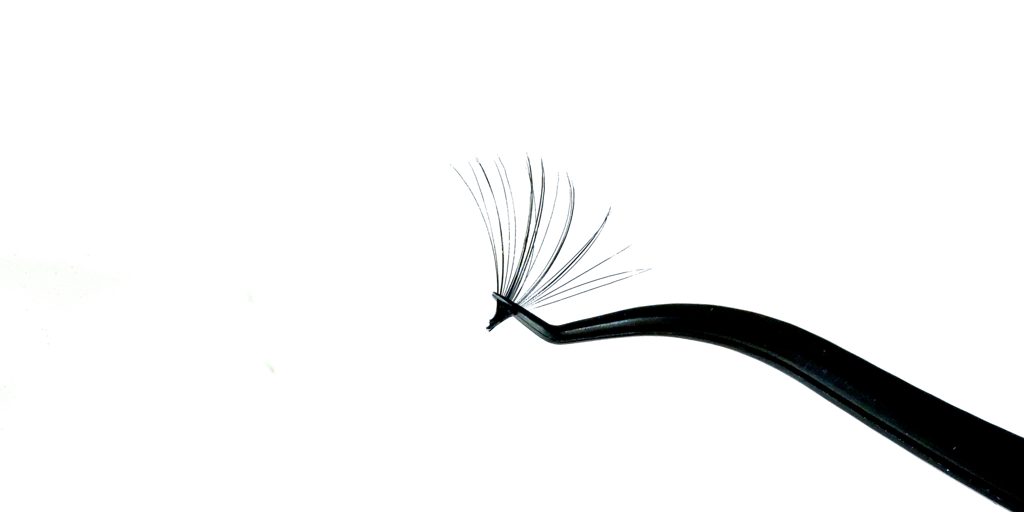
Let’s face it, volume is trending! You will always have those few clients who prefer a soft natural classic look, but the volume clients are your money-makers. So, how can you keep them happy? From Instagram feedback alone, it has come to our attention that everyone OOO’s and AHHH’s at extreme volume lashing. But where do you even start? Grab your volume tweezers and we’ll show you the next steps!
TAKE AN ADVANCED CLASS!
Even if you are already lash certified, taking an advanced lashing class will seriously improve your skills. There will likely be a lot of information that you already know. However, having a master lash artist critique and guide you in the right direction with technique and new methods in volume lashes is so beneficial. If you are looking for an advanced class, check out The Lash Pro’s Volume Course.
ISOLATE!
This seems like a minor detail in the grander scheme of VOLUME. However, if you want full lashes, you will need to utilize as many natural lashes as possible! Not only will improper isolation cause pain and damage the natural lashes, it will sabotage your attempt at any type of volume! You can’t extend every single natural lash if you aren’t isolating each and every one!
TIMING!
Again, minor detail? Nope. Getting your timing down is imperative to producing volume lashes for your clients. It is a time-consuming process but is so worth it when you can look at the finished product and say, “I DID THAT!” (and of course, post about it on Instagram!) By getting a lashing rhythm down, you will be able to utilize every second of each lash appointment and by utilizing every second each lash appointment, you will be able to produce some serious volume!
GO SHORT FOR EXTREME VOLUME LASHES!
This seems counter-active to the end-goal of “BIGGER” lashes, but believe me when I say that it will change your lash-life. Basically, it’s the same concept as the hair on your head. Long wispy hair would would look much more thick and dense if it were cut short, right? Well imagine how much fuller a set of lashes would look if they weren’t ALL 15mm! Creating density closer to the lash line will almost immediately give the illusion of volume. Give it a try!
Unfortunately, all lashes are not created equal. Some clients just won’t have the amount of natural lashes needed to create the EXTREME VOLUME look that they crave. With these tips, though, you might be able to get a little more volume with those less-lashed clients (and A LOT more volume with your clients who seem to drink biotin for breakfast).
Lashes: Choosing Diameter, Length, Curl
Lashes: Choosing Diameter, Length, Curl
November 11, 2017 by The Lash Professional.

We have all had those clients who tell US what they want on their lashes. It is a rare occasion that what they want is what they should have! But do you know how to choose the correct diameter, length, and curl for each of your clients? Well, let me help by breaking it down for you!
Choosing the right lashes: DIAMETER
First, you will choose an appropriate lash diameter to start with. You can determine the diameter of lash extension to use by the diameter of your clients NATURAL lash! Generally, the goal is to match the natural diameter, but there are few situations where you might go slightly thicker than the natural. Though, matching the diameter to the clients natural lash is a good rule of thumb. Seems easy enough?
Choosing the right lashes: DIAMETER
Next, the length of the lash extension! The goal is, more times than not, to EXTEND those natural lashes. Next, determine the style they are looking for! Do they want something drastic? Do they want something subtle or full? Longer will appear more wispy, and shorter ones that are much closer to the natural lash length will give them a much fuller and darker appearance. But you will need to determine the style your client desires.
Diameter and Length SIDE NOTE: Determine whether or not your clients natural lashes can support the weight of whatever you choose for these two categories. Some clients have great lashes but some have weak ones and anything too long or heavy will literally break their natural lashes. If you come across a client with weak ones, recommend they wait to get lashes and prescribe them a lash serum! The Lash Professional offers “Lash Strong” which is a great selling/retail option for artists to carry but also an incredible product for clients to use; IT WORKS WONDERS!
Choosing the right lashes: CURL
Now it’s time to choose the curl of the lash extension. Hopefully, if you are trained in lash extension-ing you have gotten the “low-down” on the different curls. If not, here is a basic breakdown.
J Curl– the least amount of curl and most closely resembles the majority of natural lashes, but not commonly used
B Curl– the basic curl, gives a super natural look and is most commonly used for the inner corner of eyes to prevent hitting the nose. Find amazing B Curl Volume lashes here!
C Curl– the most commonly used curl, gives a noticeable but not drastic curl
D Curl– the most visible and dramatic curl, gives the most lift
L Curl– shaped similar to an L, intended for lash clients with hooded eyes but not limited to.
If you don't know much about curl, I would encourage you to dive deeper into that category. Going through these few steps to choosing lashes for each client can seriously boost your abilities to master any style, but most importantly will ensure you are doing what’s best for your clients’ natural lashes!
Favorite Eyelash Application Tips From Lash Experts
Favorite Eyelash Application Tips From Lash Experts
October 10, 2019 by The Lash Professional.

The eyelash extension guide you've been asking for is finally here. We've put together the most exclusive tips from our favorite lash experts, from what eyelash extensions are to curl, color, and more.
With all these lash artist tips in one place, learning how to lash has never been easier! So, what are you waiting for? Grab your eyelash extension kit and let's get started!
The Lash Professional's Eyelash Extension Guide
What Are Eyelash Extensions?
There is no better place to start this guide off than by explaining what eyelash extensions are. Whether you're brand new to the lashing or could use a refresher, we've got you covered!
In short, eyelash extensions are thin fibers that are meant to resemble natural eyelashes. They're attached to your natural eyelash line using semi-permanent adhesive to create the appearance of fuller and longer eyelashes.
How Do Eyelash Extensions Work?
Eyelash extension application is a detailed service that should only be performed by a licensed eyelash technician. Nonetheless, for this eyelash extension guide, we’re giving you the quick and dirty of how eyelash extensions work.
- Discuss with the client about their expectations and preferred eyelash look.
- Use your eyelash extension knowledge and experience to design flattering lash looks expertly.
- An eyelash extension or a group of eyelash extensions are applied to a single natural lash to create a fresh-eyed appearance.
- Educate your client on how to care for eyelash extensions post-application appointment.
PS This a not complete rundown of eyelash extensions. You’ll just have to attend our hands-on eyelash extension course in Phoenix to learn that information! However, it’s our quick rundown of the eyelash extension process.
Types of Eyelash ExtensionsWe've already touched a bit on what volume eyelash extensions are, but let's go into the juicy details! When talking about classic vs. volume eyelashes, we're really talking about the technique you use when applying lash extensions.
To elaborate, the classic eyelash extension technique requires the technician to apply one lash extension to a single natural lash. Typically, this technique is used on clients that want a simple, everyday lash.
In comparison, a lash technician will apply multiple extensions to a single natural lash to create a fuller appearance. These are not eyelashes for the faint of heart! Volume eyelashes are made for clients who want to harness the bold lash boss inside of them.
If you thought that eyelash extensions only came in black, think again!
Colored eyelash extensions are a trend you do not want to miss. Create bold, show-stopping looks with a variety of colored lashes that put the ‘drama’ in ‘dramatic.’
Don’t get it twisted—colored lashes aren’t just statement embellishments! Colored lashes are also sneaky tricks that experienced eyelash extension technicians use to complement a client’s eye color.
Tell your girlfriends, your family, and especially your clients that aftercare is important! If you’ve done your job right, your clients will leave the salon with eyelashes to take a selfie for.
Nonetheless, it is up to the client afterward to maintain their eyelash extensions. The following are our top tips technicians should communicate to their client to keeping fresh-looking extension and, in some cases, extend the life of lash extensions:
- Clean your extensions daily using a mild, oil-free cleanser. In addition, use a lash brush to remove residual debris and oils.
- Avoid excess moisture. This doesn't mean to alter your regular hygiene routine; however, it does mean to skip the steam facial and opt for a relaxing mud mask.
- Schedule regular lash refills to maintain the voluminous appearance of the extensions.
All in all, a regimented aftercare routine will allow clients to get the most out of their lash extensions. Remind your client often after appointment care to encourage positive habits. Even better, create an eyelash extension business card with lash aftercare tips on the back.
We have some pearly gems of truth to drop that may surprise a few of you. Truth is you are only as good as your eyelash extension supplies. If you’ve ever tried applying lashes with ineffective glue or unusable tweezers, then you know what we mean.
That said, we’re here with a quick rundown of eyelash extension supplies that you’ll need to lash like a pro.
Drying vs Curing
November 7, 2019 by The Lash Professional.
Drying vs. Curing: What Lash Artists Need to Know About Eyelash Extension Glue
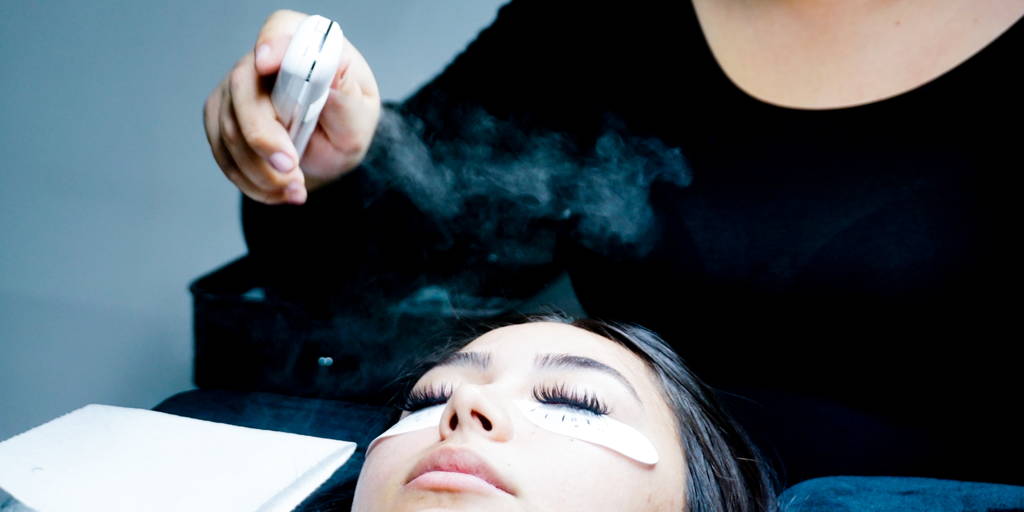
Let’s talk about something super important in the lash world—drying vs. curing. If you’ve ever wondered what the difference is when it comes to eyelash extension glue, you’re not alone. This is one of those topics that every lash artist needs to understand, especially if you’re looking to improve your retention game and keep your clients coming back for flawless lashes.
As a lash artist I’m here to break it all down in a way that’s easy to understand. So, grab your tweezers and let’s dive into the science behind drying and curing, and how they affect your lash application process.
What Does “Drying” Mean for Lash Glue?What is drying?
Drying refers to the initial stage of the adhesive setting. This happens when the adhesive starts to bond to the natural lash, but the bond isn’t fully secure yet. Think of it as the “getting there” stage—it’s not ready for prime time just yet.
Key Points About Drying:
-Drying happens almost immediately after you place the extension on the natural lash.
-The adhesive might feel tacky during this phase, but it’s not completely set.
-Humidity, temperature, and airflow all play a big role in how quickly the glue dries.
What Does “Curing” Mean for Lash Glue?
Curing is the next step after drying, and this is where the magic happens! During the curing phase, the adhesive fully hardens and forms a strong, long-lasting bond. Curing is what ensures the extension stays in place until your client’s next fill.
Key Points About Curing:
-Curing is a chemical process where the adhesive solidifies as it reacts with moisture in the air.
-It typically takes 24 hours for the adhesive to fully cure, which is why we tell clients to avoid water and steam for the first day.
-Proper curing is critical for retention—without it, lashes won’t last as long.
Drying vs. Curing: What’s the Difference?
| Aspect | Drying | Curing |
|---|---|---|
| Timing | Happens immediately after application | Takes up to 24 hours to fully complete |
| Bond Strength | Initial bond is formed | Bond is fully secure and hardened |
| Role of Humidity | Speeds up or slows down drying time | Necessary for curing (moisture activates glue) |
| Effect on Retention | Weak bond if not dried properly | Essential for long-lasting extensions |
How to Optimize Drying and Curing
Common Mistakes with Drying and Curing
Even experienced lash artists can run into issues if they’re not careful. Here are some common mistakes to avoid:
Using Too Much Adhesive: This can slow down drying time and lead to poor curing. Always use a tiny bead of glue.
Ignoring Humidity Levels: If your adhesive isn’t performing well, check your environment—it’s likely the culprit.
Skipping Aftercare Education: Clients who expose their lashes to water too soon can compromise curing, leading to premature fallout.
Why Drying and Curing Matter for Retention
Here’s the bottom line: If your adhesive doesn’t dry and cure properly, your retention will suffer. Clients won’t be happy with extensions that fall out too soon, and you’ll find yourself spending more time fixing issues instead of building your business.
When you understand the science behind drying and curing, you can troubleshoot retention problems, adjust your techniques, and create lashes that last.
Final Thoughts on Drying vs. Curing
Understanding the difference between drying vs. curing is a total game-changer for lash artists. When you get it right, your lashes will last longer, your clients will be happier, and your business will thrive.
By controlling your environment, choosing the right adhesive, and educating your clients, you’ll set yourself up for success—and flawless retention every time.
Here’s to mastering the lash game, one perfect bond at a time!


